Domain settings
Before you can activate your own domain for use as a sender, you need to adjust some settings on the domain itself.
If you are unsure how to configure the necessary settings, it is best to ask your IT department/representative or check the domain provider's website.
The following DNS entries must be created for the domain:
SPF
- DNS entry on main domain
Example: mydomain.de
TXT entry (incl. quotation marks):
"v=spf1 mx a include:spf.codepiraten.com ~all"
- If you already have an SPF entry, you only need to add the include part to your existing entry, e.g.:
"v=spf1 mx a ipv4:meine-ip ipv4:meine-andere-ip [...] include:spf.codepiraten.com ~all"
- Test your SPF entry: here
DKIM
DMARC
The DMARC entry is not mandatory, but it improves the deliverability of emails.
Once you have entered these three items, a zone file would have the following new entries:
@ IN TXT "v=spf1 mx a include:spf.codepiraten.com ~all"
guestoo._domainkey IN CNAME dkim.codepiraten.com.
_dmarc IN CNAME dmarc.codepiraten.com.
Settings in guestoo
Once you have made the necessary settings for the domain, you can activate the sender domain for use at guestoo.
This is how
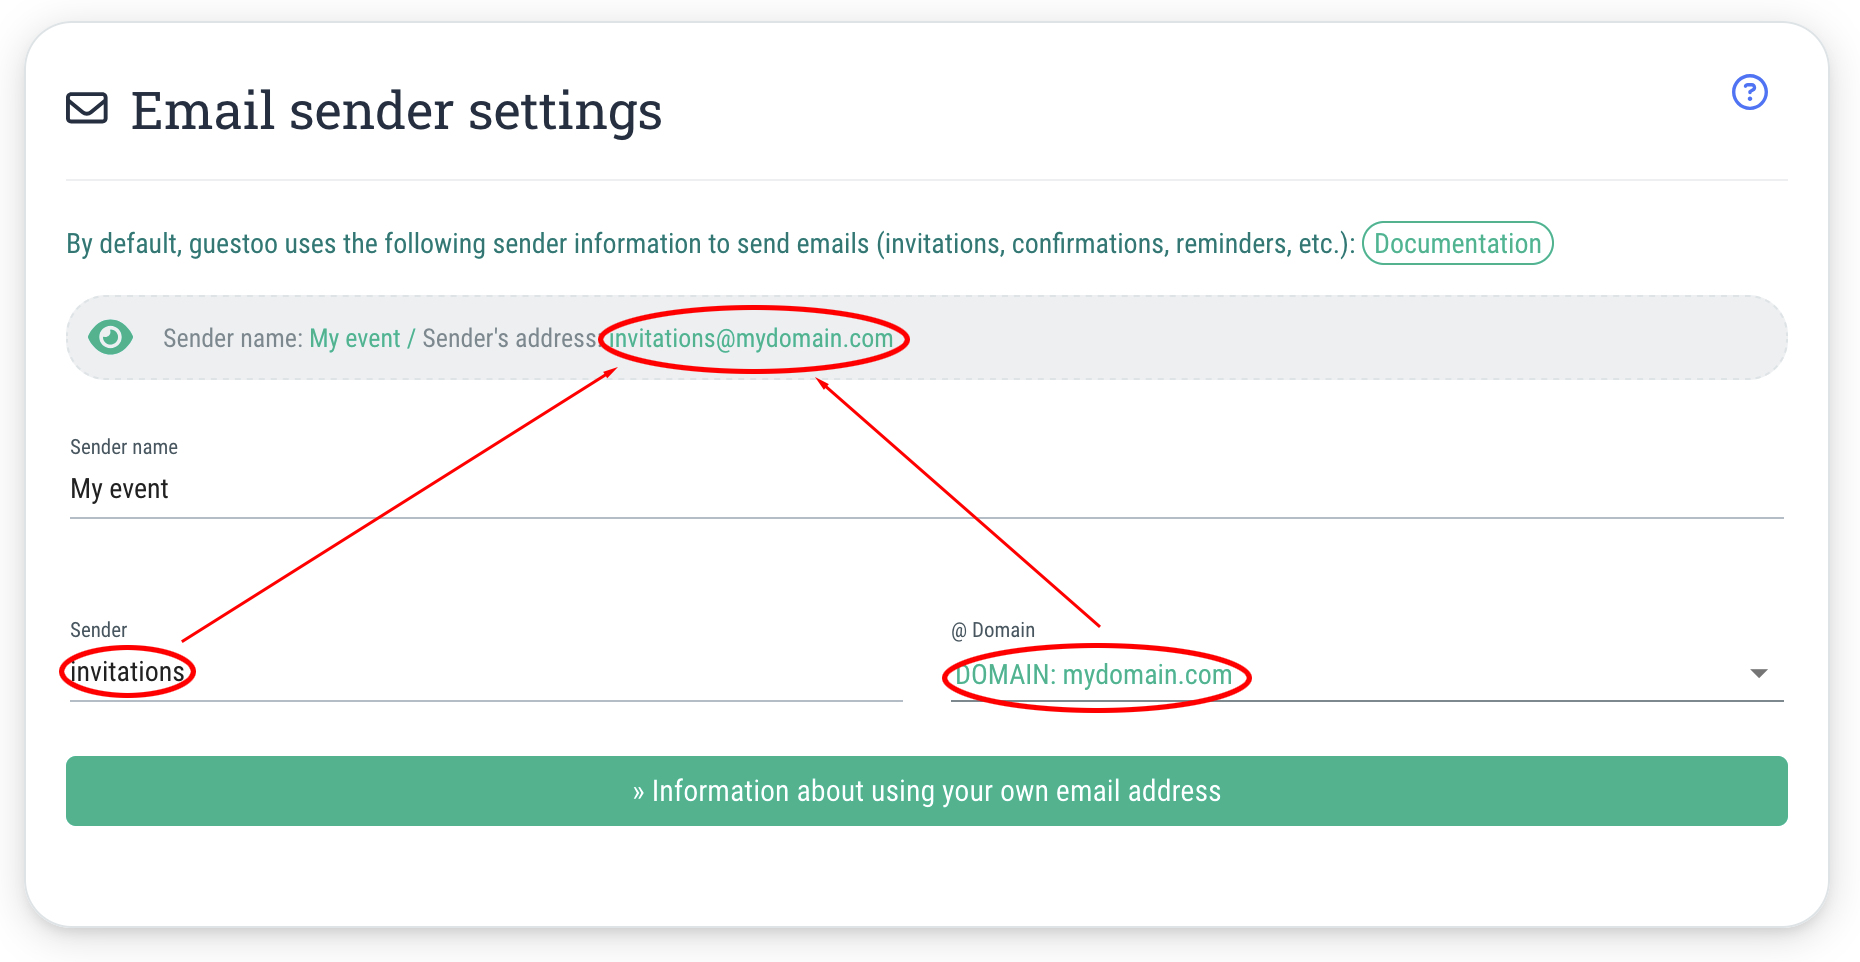
- Go to the Menu item "Settings"
- Switch to the tab "Email settings"
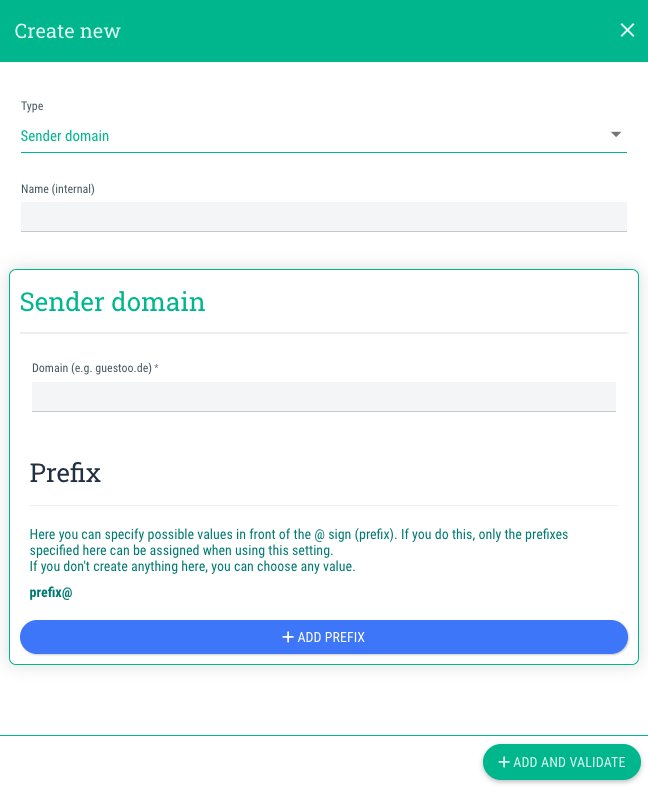
- Click on the button "+Create new"
- Type: Sender domain
- Name (internal):
Here you can enter a name for the domain that only you and other users in your agency can see.
- Domain:
Enter the domain you want to use here, e.g., yourname.de (without https://www or similar).
- Prefix:
Here you can specify which prefixes (= the part of the email address that comes before the @) should be available for selection.
Note: This setting is NOT necessary, unless you want to restrict the selection of prefixes for your agency's users. If you add prefixes here, you can only use these as senders for your agency and you will not be able to enter free text!
- Click on "+Add & Validate"