Event page

Here you can find out how to customize the appearance of your agency's event overview page.
You can find all the settings explained here in the “Event page” tab of the agency settings.

Du kannst für das guestoo Back-End zwischen zwei Darstellungsoptionen wählen. Die Screenshots in der Doku basieren auf dem "Klassischen Design".
Hier siehst Du die Unterschiede, damit Du dich auch im "Modernen Design" zurecht findest: » guestoo Back-End-Design

Status of the event overview page

Status of the event overview page -

Here you define the status of the event overview page.


  • Online means that your event overview page is active and your guests can visit it.
  • Offline means that your event overview page is not active and therefore cannot be visited by your guests.


The event overview page can be useful when:

  • You are planning several events and want to give your guests a better overview of what is on offer
  • You want to let your guests choose from several events
  • etc.


You can change the status of the event overview page by doing the following:

  • Go to the “Event page” tab in the agency settings
  • Click on "Edit"
  • Choose between “Online” (green) and “Offline” (red)
  • Click on “Save” to apply the changes

Path to the site

Path to the site -

Here you can customize the path or URL to your event overview page.

This is how it works:

  • Go to the “Event page” tab in the agency settings
  • Click on "Edit"
  • Enter the desired URL abbreviation
    Note: The URL abbreviation refers to the part of the URL after the /.

    Example:
    • URL abbreviation: codepiraten
    • URL to event overview page: https://events.guestoo.de/codepiraten
  • Click on "Save"
  • Done - you can now share the link to your event overview page with your guests

Note: You can view the URL to your event overview page at any time here directly next to the eye symbol and simply copy it.

Template

(Pro subscription and higher)

Template - (Pro subscription and higher)

If you use guestoo in the Pro subscription or higher or have booked the corresponding feature, you can select the template to be used for your event overview page here.

You currently have the choice between the following templates:

  • Modern FullView 2024
  • Classic (Standalone page)
  • Modern (suitable as an iFrame)
  • Calendar view

Note: You can change the template at any time to see how the change affects your event overview page. No settings will be lost by changing the template!


Below the template settings, you also have the option of setting what happens when someone clicks on the button next to the event.

You have the choice between:

  • Opens registration form
    If you choose this option, there will be a button labeled “Register now” in the event listing for each individual event. By clicking on this button, your guests will be forwarded directly to the registration form for the respective event.
  • Opens event page
    If you choose this option, there will be a button labeled “View event” in the event listing for each individual event. By clicking on this button, your guests will be redirected to the event page of the respective event. They can view all the information maintained there and, if activated, will find another button to register for the event.


In order to change this setting, proceed as follows:

  • Go to the “Event page” tab in your agency settings
  • Scroll to the "Template" section
  • Click on "Edit"
  • Select the desired template and decide on the corresponding forwarding (Opens registration form / Opens event page)
  • Click on "Save"

Settings

Settings -

Here you can define who can see the event overview page:

  • Anyone can see the page
    If you select this option, anyone who knows the link can view your agency's event overview page.
  • Login required
    If you choose this option, a login screen will appear on the event overview page so that the guest must first log in to be allowed to view the page.

Show only events with specific tag

Show only events with specific tag -

Here you have the option of adding tags to influence the default view of your event overview page.

This is how it works:

  • Go to the “Event page” tab in the agency settings
  • Scroll to the section "Show only events with specific tag"
  • Click on "Edit"
  • Click on the desired tag(s)
  • You also have the option of creating new tags: In order to do this, enter the tag under “New tag” and click on the “+” symbol - the new tag will automatically be added to your selection
  • You can remove a tag from your selection by clicking on the “X” next to it
  • When you are finished with your selection, click on “Save” in order to save your changes

If you enter one or more tags here, only the events with one or more of these tags will be displayed on the event overview page.


You can find out how to assign tags at the event here.

Integrate event page as iFrame into own website

Integrate event page as iFrame into own website -

Here you will find the HTML code you need to integrate the event overview page as an iFrame into your own website.


You can simply copy the HTML code displayed and paste it into the HTML code of your website at the desired location. In the section Influence page content you can find further information about the parameters you can add to the HTML code to further influence the iFrame.

Influence page content

Influence page content -

To control which events are shown on the event page, you can use the two parameters tag (keywords assigned to the event) and campaign (campaigns assigned to the event).

Example:
https://events.guestoo.de/a/deineurl?tag=TAG1,TAG2&campaign=CAMPAIGN1

If there are several campaigns or tags, they are written one after the other with ",". The OR rule applies here (all events are displayed that have at least one that have tags assigned to them.
If there are tag and campaign as parameters, these two are linked with AND. In the example, all events are displayed that have either the tag PLAYWORD1 OR TAG2 AND assigned the campaign CAMPAIGN1.


Important: Event overview page opens registration form / calendar viewIf you have activated this option or use the calendar, then you should add the parameter "framed" src="...?framed" to the URL, so that the payment process works smoothly in all browsers.

If there are still problems with the login, the &window parameter ensures that the login form opens in a new window instead of a dialog window.


Suppress cookie notification
To suppress the cookie hint the parameter "hideCookieinfo=true" can be added to the call.


Set language
To specify the language the parameter "lang" can be appended to the call. Examples: lang=en // lang=en // lang=fr


Set date of events
You can display all events of a day or from - to.
Example a day: &day=2020-04-15
Example from - to: &startDate=2020-04-15&endDate=2020-04-17


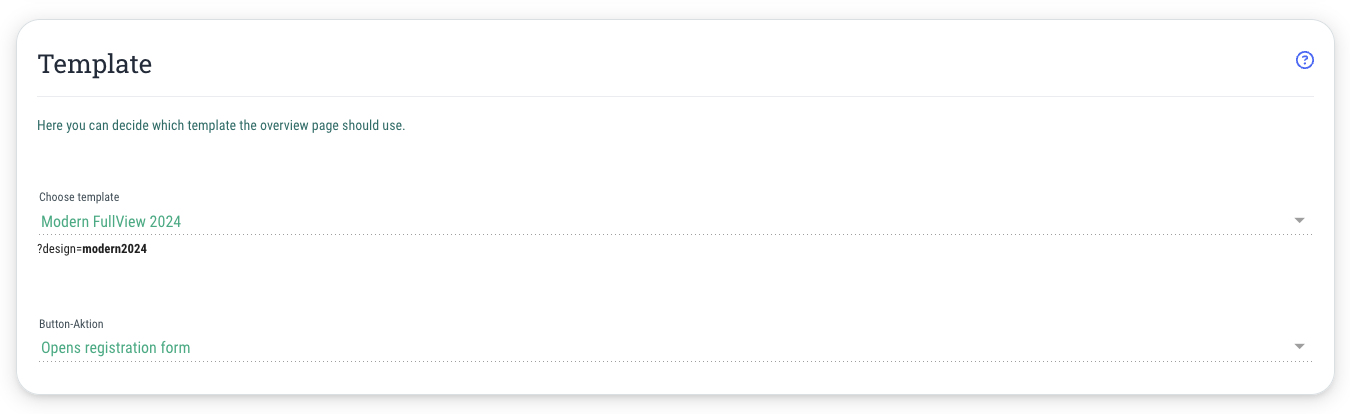
Control design with a parameter
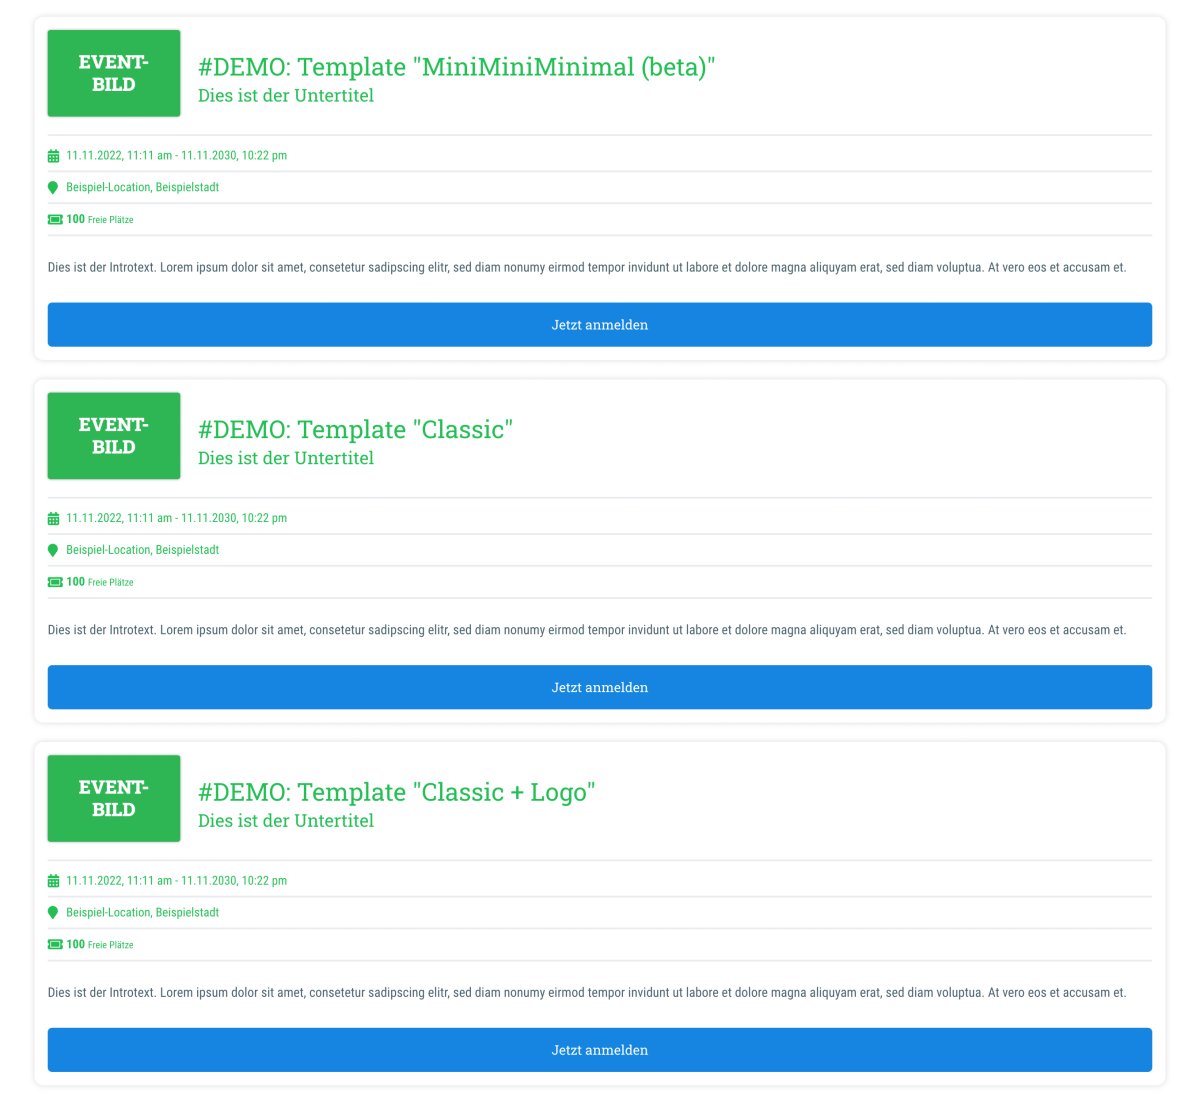
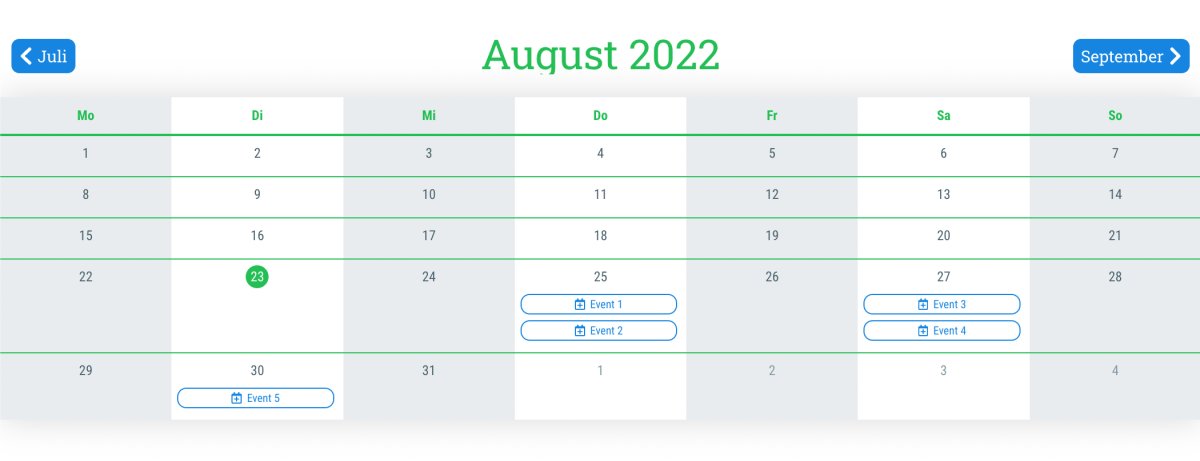
You can set the design in general with the option above or control it with a parameter in the URL. Append "design" to the call. Examples: design=classic // design=modern // design=calendar


You can transfer your own class to the HTML tag of the event overview page and then, in combination with your own CSS code on the Agency > Design page, achieve a different appearance depending on the call. Use the parameter &additionalClass.


Example:
https://events.guestoo.de/codepiraten?design=modern&additionalClass=meineKlasse

Sort events

How to customize the order of your events on the event overview page

In addition to the options already listed, you also have the option of defining the display order of your events directly on the event overview page.

You can find out how this works here.