

Please note that all exports that you request through guestoo will have German column names, as these exports are not available in English!!
Excel export
Here you can find out how to download an Excel export with the guest data for your event and what options you have to filter it in order to adapt it to your needs.
 Du kannst für das guestoo Back-End zwischen zwei Darstellungsoptionen wählen. Die Screenshots in der Doku basieren auf dem "Klassischen Design".
Hier siehst Du die Unterschiede, damit Du dich auch im "Modernen Design" zurecht findest: » guestoo Back-End-Design
Inhalte dieser Seite:
Important note on exports
Generate export
This is how you generate an Excel export of the guest data:
- Go to the desired event
- Go to the menu on the right side
- Click on the menu item "Excel export"
- A dialog window opens in which you can configure the desired filters and settings
The settings that you can adjust in the dialog window are explained further down on this page! - Once you have made all the settings, click on the “Start export” button at the bottom right
- You will receive an email containing a ZIP file within the next few minutes
- In order to unpack the ZIP file, you will need the password that is displayed in the dialog window. However, you can also view the password at any time under Agency > Info > Security.
Important: Please note that the download link in the email is only valid for 24 hours! After that it will expire and you will have to generate a new export.
Template

If you have already created a template for an Excel export and would like to use it, you can select it from the drop-down menu at the bottom (to the left of the “Start export” button) and then start the export.
You can find out how to create an export template further down on this page.
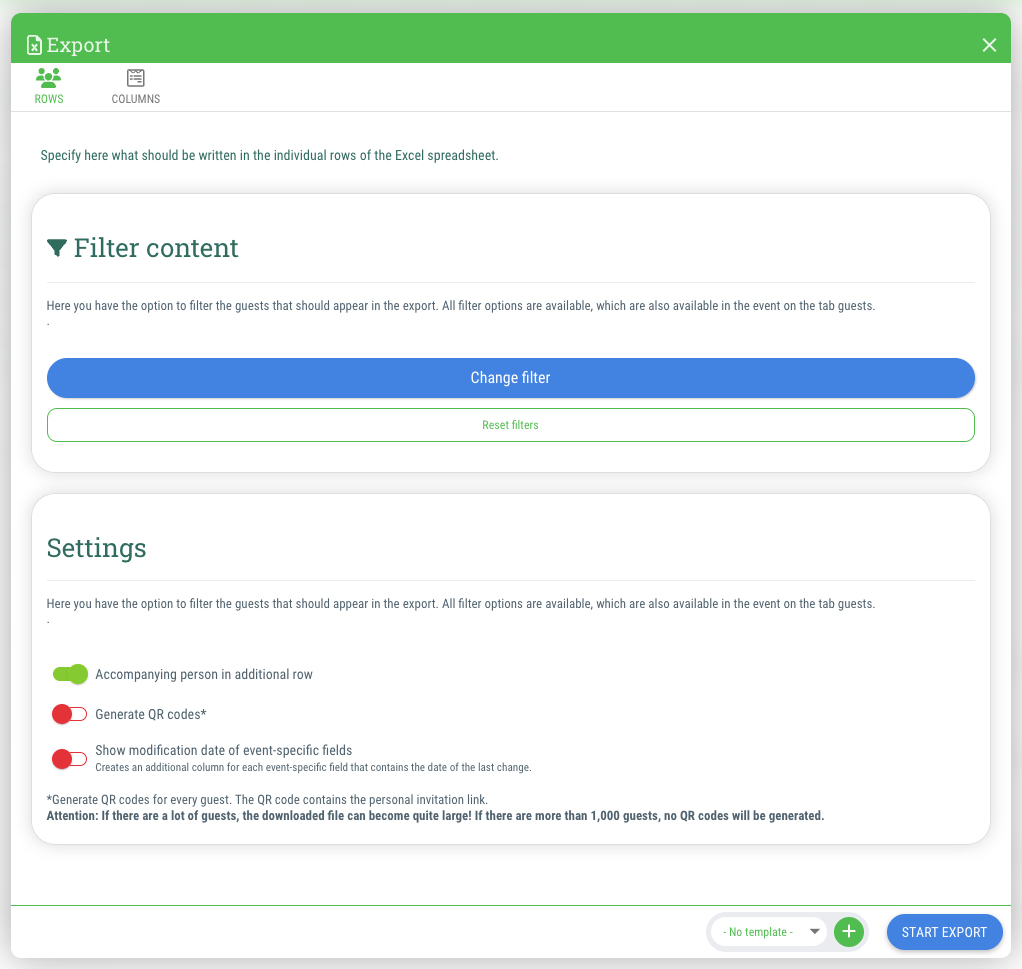
Filter content
Here you have the option of filtering the guests that you want to appear in the export.
In order to do this, click on the “Set filter” or “Change filter” button
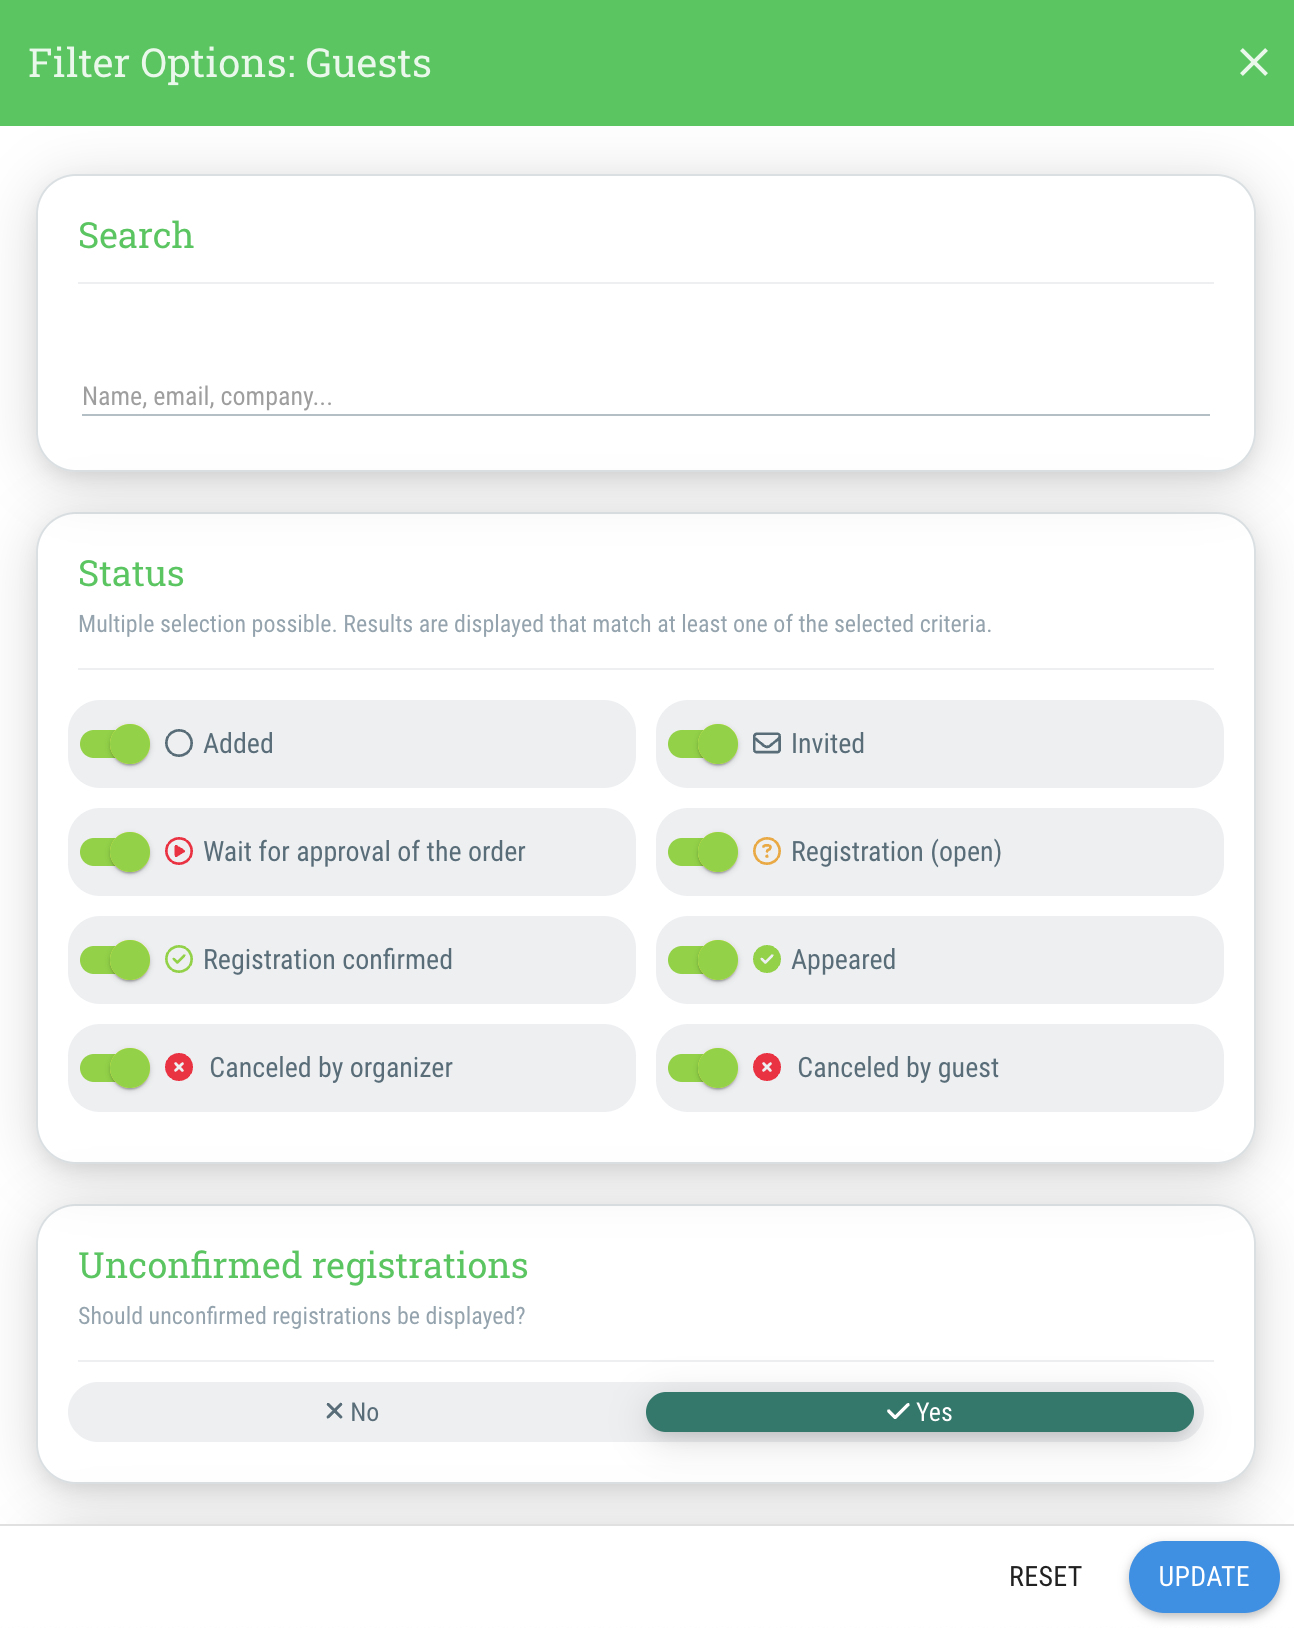
You have the following filter options here:
- Search
Enter e.g. name, company or email here to filter for all guests who match this criterion - Status (Multiple selection possible)
You can find an explanation of the different statuses here.
- Added
- Invited
- Waiting for approval of the order
- Registration (open)
- Registration confirmed
- Appeared
- Canceled by organizer
- Canceled by guest
- Unconfirmed registrations
- No
- Yes
- VIP
- No
- Yes
- Guests on waiting list
- All
- Only waiting list
- Only no waiting list
- Orders to be approved
- All
- Only not approved
- Only already approved
- Public participant profile
- All
- Only deactivated profiles
- Only activated profiles
- Invalid email addresses
- No
- Yes
- Origin (event-specific)
- Tickets
All tickets available for the guest to choose from are displayed here. Click on a ticket to filter the guest list according to the guests who have purchased the ticket. - Timeslots / Smart selection list
Here you will be shown an overview of all event-specific fields of the type “Timeslot / Smart selection list” that you have created, including all timeslots that are available for selection. If you click on one or more timeslots, you will only be shown guests who selected one of these timeslots when they registered. - Selection list
All event-specific fields of the “Selection list” type that you have created are displayed here, including the selection options. You can click to select which option the guest must have selected when signing up in order to appear in the filtered guest list. - Checkbox
If you have created event-specific fields of the type “Checkbox”, these will be displayed here. By clicking on the desired field, the guest list is filtered according to guests who clicked on this checkbox when signing up for the event. - Event-specific fields (of the type "Text" or "Number")
Here you can enter a value that must be entered in a certain event-specific field of type text or number for the guest to appear in the filtered overview. - Check-in status
- All
- Checked in
- Checked out
- Present from
- Date
- Time
- Present until
- Date
- Time
- Keywords (multiple selection possible)
Here you can click on the keywords you want to filter by. If you click on several keywords, only guests who have been assigned all the keywords that you clicked on will be displayed. - Campaigns (multiple selection possible)
Here you can click on the campaigns you want to filter by. If you click on several campaigns, only guests to whom all clicked campaigns are assigned will be displayed. - Agreements (multiple selection possible)
- Only guests who have the value assigned
- Only guests who do NOT have the value assigned (one is enough)
- Languages (multiple selection possible)
Here you can select which language(s) must be set for the guest to appear in the export.
Tip: You can delete the set filters by clicking on the “Reset filter” button.
Settings
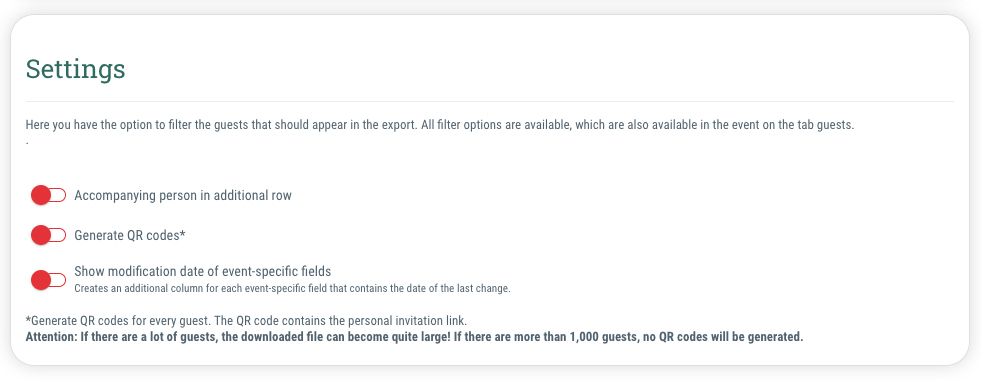
You also have the following options in the “Settings” section:
- Accompanying person in separate row
If you activate this option, each accompanying person is displayed in a separate row. - Generate QR code
If you activate this option, a QR code with a personal invitation link will be generated for each guest.
Attention: If there are many guests, the download file can become quite large! If there are more than 1,000 guests in the export, no QR codes will be created! - Show modification date of event-specific fields
Creates an additional column for each event-specific field that contains the date of the last change.
"Columns" tab
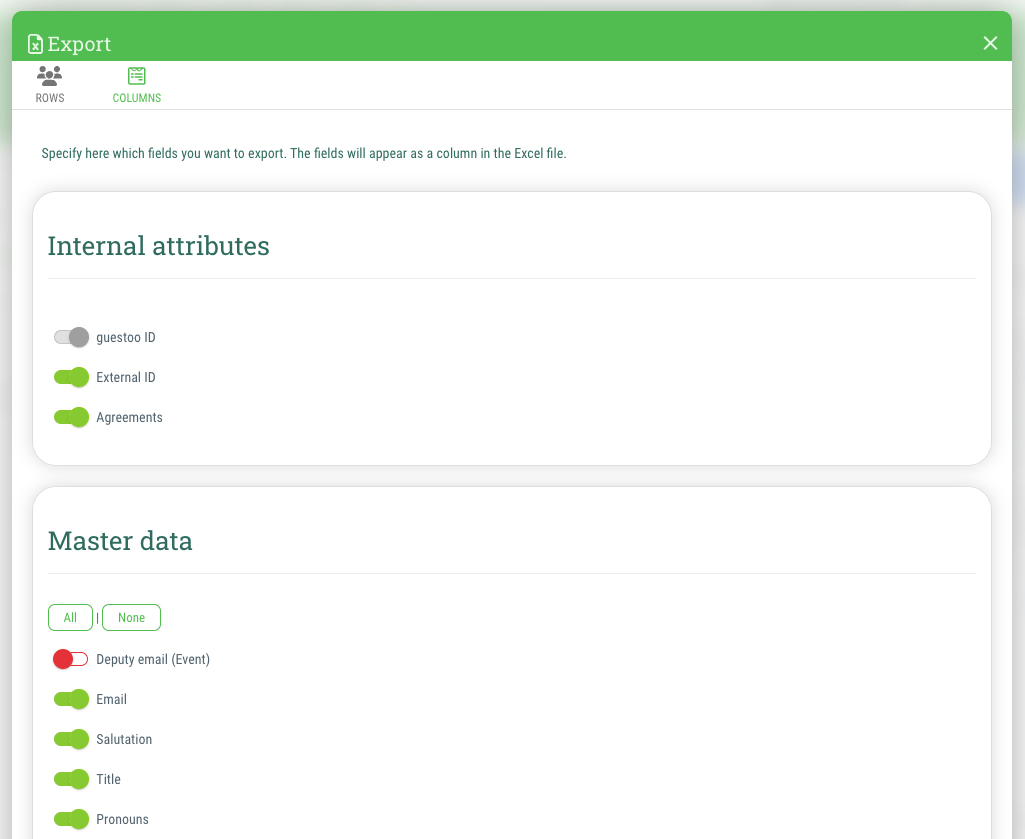
If you switch to the “Columns” tab in the dialog window, you have the option of specifying which information should be included as a column in the Excel export.
You can (de)activate the following fields:
Internal attributes
- guestoo ID
- External ID
- Agreements
Master data
- All / None
You can (de)activate all or none of the master data by clicking on one of these buttons - Salutation
- Title
- Pronouns
- First name
- Last name
- Salutation phrase
- Image
- Birthday
- Gender
- Phone number
- Mobile number
- Address
- Company address
- Company/Organization/Institution
- Position
- Web
- Info
- Covid status
- Accompanying person info
Dynamic attributes
Coming soon
Event-specific information
Coming soon
Other
- Invoice address
- Internal note
- VIP
- Language
- Tags
- Campaigns
- Notifications
- Internal note (Event)
- External note (Text module - Event)
- Ticket promotion code
- Event-specific field codes
- Deputy email
- Status
- Date added/invited
- Origin
- Total persons
- Checked-in persons
- Checked-out persons
- Check-in time
- Check-out time
- Registration date
- Invitation link
- Invitation code
- Cancellation link
- Check-in link
- Manual confirmation
- Manual confirmation details
- Reason for cancellation
- Date of cancellation
- External Test code (Covid)
- Tickets
- Seat
- Invitation email opened
- Event page visited
- Event page opened Number
- Email sender settings
- Information on incorrect email address
Dynamic text blocks
Coming soon
Create export template
Save your export settings for later
If you wish, you can save the settings you have made and the filters you have set in order to generate an export with the default settings in the future with just a few clicks.
This is how:
- Set all desired filters and determine which columns you need as described above
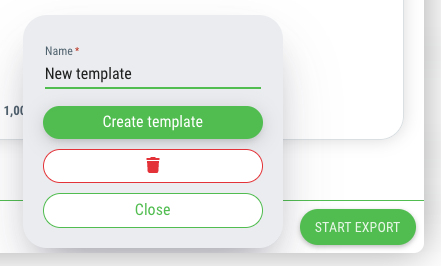
- Then click on the + symbol at the bottom left next to the “Start export” button
- Enter the desired name for the export template. You will later find the template under this name in the drop-down menu.
- Click on the "Create template" button
- Done!
Change template
In order to change an already existing export template, proceed as follows:
- Choose the desired template in then dropdown menu
- Make the desired changes to the filters and settings
- Click on the gear icon next to the dropdown menu
- Click on the “Save current” button to save the new settings and filters for the selected template
- If you would like to save a completely new template instead, click on the “Create as new template” button. The previously selected template will remain in its old state and another template will be saved with the revised settings.
- In order to delete a template, click on the recycle bin icon