Dyn. attributes

With dynamic attributes, you can expand your guests' master data as desired, e.g. to retrieve membership numbers and other relevant information.

Du kannst für das guestoo Back-End zwischen zwei Darstellungsoptionen wählen. Die Screenshots in der Doku basieren auf dem "Klassischen Design".
Hier siehst Du die Unterschiede, damit Du dich auch im "Modernen Design" zurecht findest: » guestoo Back-End-Design

Paid additional feature

Paid additional feature -

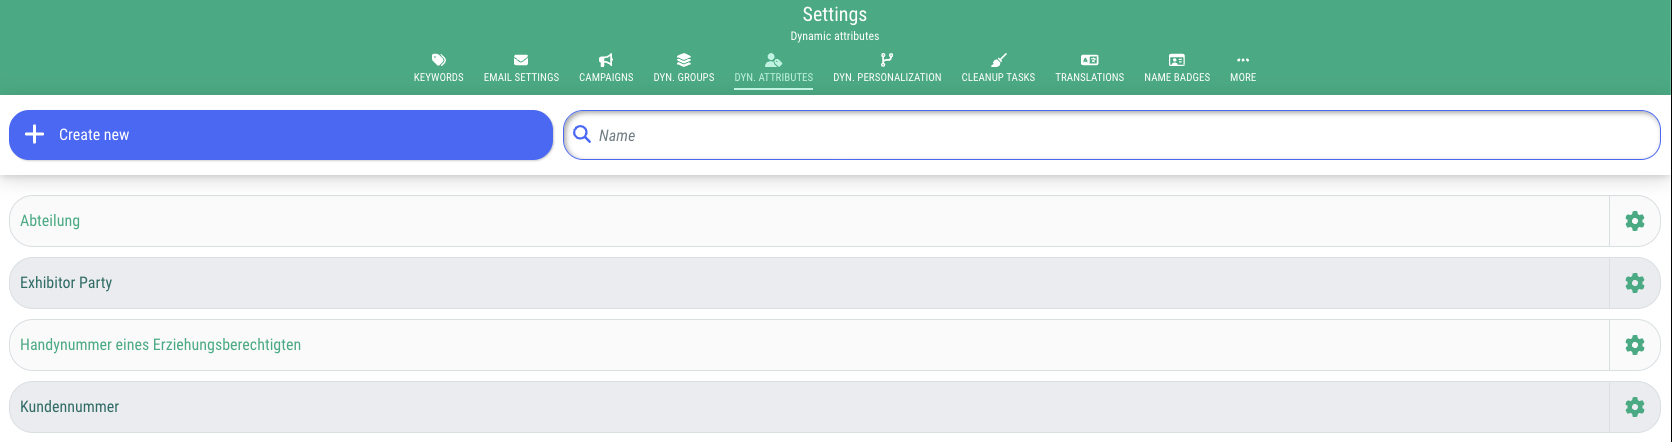
Please note that dynamic master data is an additional feature that comes at an extra cost.

You can add it to your subscription in the feature shop.

Text (single-line)

Text (single-line) -

With a dynamic master data field of the type "Text (single-line)", you can request short texts from your guests.


This is how:

  • Click on "+Create new"
  • In the dialogue window, you can enter the following information:
    • Name
      Here you enter the name of the field that should be displayed in the form.
    • Description
      If you wish, you can enter a descriptive text for the field here, in which you can provide your guests with further information about what the field is used for.
    • Code for dynamic placeholders
      If desired, you can assign a code here so that you can incorporate the content of the field as a placeholder to personalise information in e. g. emails, name tags or the event website.
    • Type
      Text (single-line)
    • Enabled
      This option should be enabled (=toggle on green) if you want to use the field.
    • Available globally
      If you activate this option, the field can always be used for conditions (event-specific fields and tickets) – even if it is not enabled in the event and therefore cannot be changed by the guest during registration.
  • Click on "+Create new"

Text area (multi-line)

Text area (multi-line) -

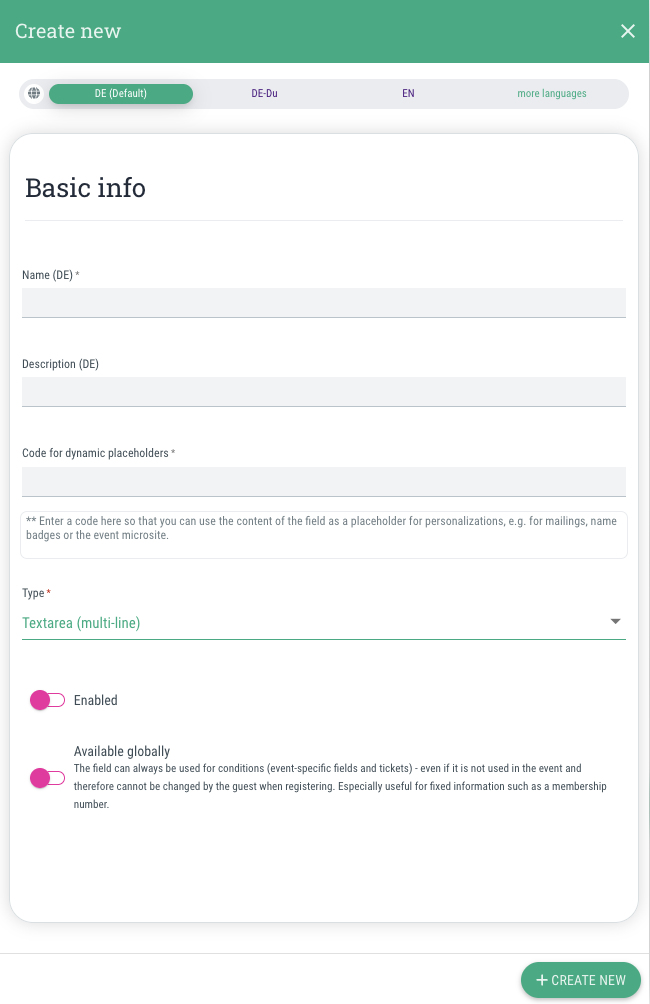
With a dynamic master data field of the type "Text area (multi-line)", you can request short texts from your guests.


This is how:

  • Click on "+Create new"
  • In the dialogue window, you can enter the following information:
    • Name
      Here you enter the name of the field that should be displayed in the form.
    • Description
      If you wish, you can enter a descriptive text for the field here, in which you can provide your guests with further information about what the field is used for.
    • Code for dynamic placeholders
      If desired, you can assign a code here so that you can incorporate the content of the field as a placeholder to personalise information in e. g. emails, name tags or the event website.
    • Type
      Text (multi-line)
    • Enabled
      This option should be enabled (=toggle on green) if you want to use the field.
    • Available globally
      If you activate this option, the field can always be used for conditions (event-specific fields and tickets) – even if it is not enabled in the event and therefore cannot be changed by the guest during registration.
  • Click on "+Create new"

Address

Address -

With a dynamic master data field of the type "Address", you can request short texts from your guests.


This is how:

  • Click on "+Create new"
  • In the dialogue window, you can enter the following information:
    • Name
      Here you enter the name of the field that should be displayed in the form.
    • Description
      If you wish, you can enter a descriptive text for the field here, in which you can provide your guests with further information about what the field is used for.
    • Code for dynamic placeholders
      If desired, you can assign a code here so that you can incorporate the content of the field as a placeholder to personalise information in e. g. emails, name tags or the event website.
    • Type
      Address
    • Enabled
      This option should be enabled (=toggle on green) if you want to use the field.
    • Available globally
      If you activate this option, the field can always be used for conditions (event-specific fields and tickets) – even if it is not enabled in the event and therefore cannot be changed by the guest during registration.
  • Click on "+Create new"

Date

Date -

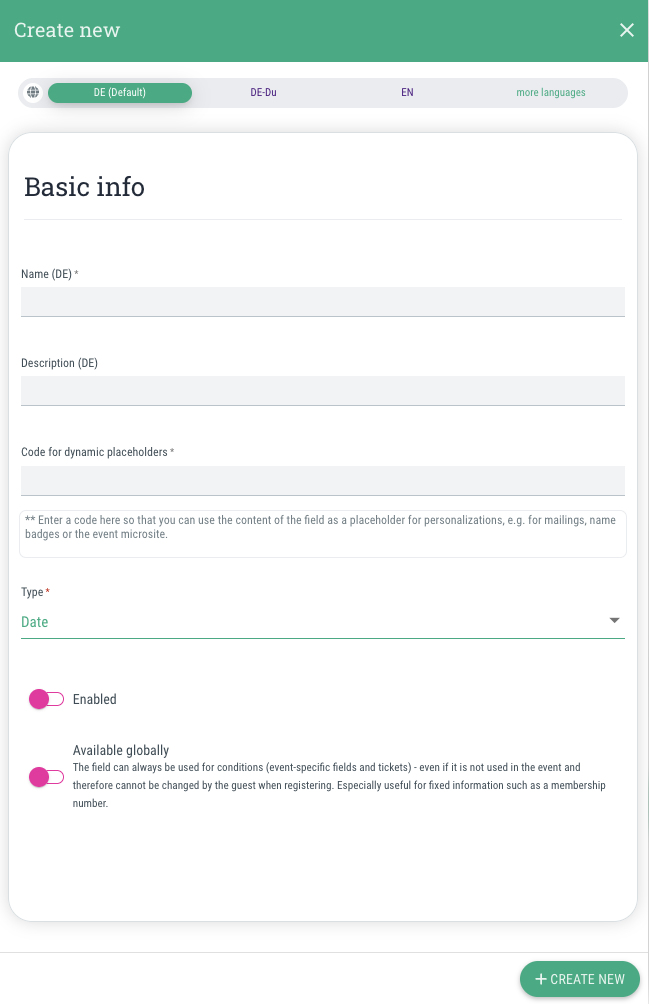
With a dynamic master data field of type "Date", you can request a date from your guests.


This is how:

  • Click on "+Create new"
  • In the dialogue window, you can enter the following information:
    • Name
      Here you enter the name of the field that should be displayed in the form.
    • Description
      If you wish, you can enter a descriptive text for the field here, in which you can provide your guests with further information about what the field is used for.
    • Code for dynamic placeholders
      If desired, you can assign a code here so that you can incorporate the content of the field as a placeholder to personalise information in e. g. emails, name tags or the event website.
    • Type
      Date
    • Enabled
      This option should be enabled (=toggle on green) if you want to use the field.
    • Available globally
      If you activate this option, the field can always be used for conditions (event-specific fields and tickets) – even if it is not enabled in the event and therefore cannot be changed by the guest during registration.
  • Click on "+Create new"

Date and time

Date and time -

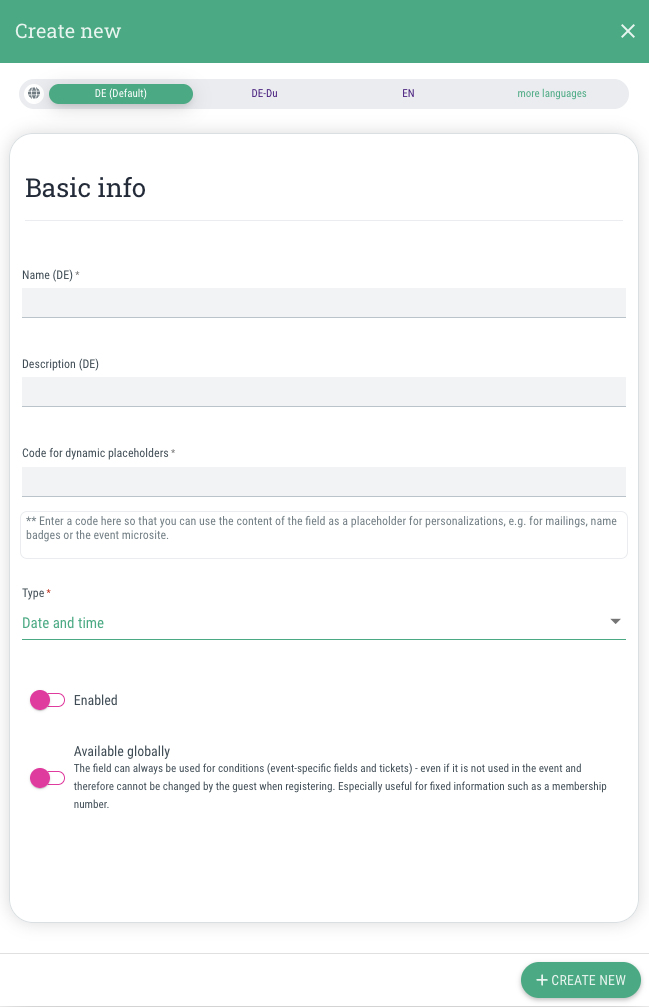
With a dynamic master data field of the type "Text (single-line)", you can request a specific date and time from your guests.


This is how:

  • Click on "+Create new"
  • In the dialogue window, you can enter the following information:
    • Name
      Here you enter the name of the field that should be displayed in the form.
    • Description
      If you wish, you can enter a descriptive text for the field here, in which you can provide your guests with further information about what the field is used for.
    • Code for dynamic placeholders
      If desired, you can assign a code here so that you can incorporate the content of the field as a placeholder to personalise information in e. g. emails, name tags or the event website.
    • Type
      Date and time
    • Enabled
      This option should be enabled (=toggle on green) if you want to use the field.
    • Available globally
      If you activate this option, the field can always be used for conditions (event-specific fields and tickets) – even if it is not enabled in the event and therefore cannot be changed by the guest during registration.
  • Click on "+Create new"

Time

Time -

With a dynamic master data field of the type "Time", you can request a specific time from your guests.


This is how:

  • Click on "+Create new"
  • In the dialogue window, you can enter the following information:
    • Name
      Here you enter the name of the field that should be displayed in the form.
    • Description
      If you wish, you can enter a descriptive text for the field here, in which you can provide your guests with further information about what the field is used for.
    • Code for dynamic placeholders
      If desired, you can assign a code here so that you can incorporate the content of the field as a placeholder to personalise information in e. g. emails, name tags or the event website.
    • Type
      Time
    • Enabled
      This option should be enabled (=toggle on green) if you want to use the field.
    • Available globally
      If you activate this option, the field can always be used for conditions (event-specific fields and tickets) – even if it is not enabled in the event and therefore cannot be changed by the guest during registration.
  • Click on "+Create new"

Number

Number -

With a dynamic master data field of the type "Number", you can request a number from your guests.


This is how:

  • Click on "+Create new"
  • In the dialogue window, you can enter the following information:
    • Name
      Here you enter the name of the field that should be displayed in the form.
    • Description
      If you wish, you can enter a descriptive text for the field here, in which you can provide your guests with further information about what the field is used for.
    • Code for dynamic placeholders
      If desired, you can assign a code here so that you can incorporate the content of the field as a placeholder to personalise information in e. g. emails, name tags or the event website.
    • Type
      Number
    • Enabled
      This option should be enabled (=toggle on green) if you want to use the field.
    • Available globally
      If you activate this option, the field can always be used for conditions (event-specific fields and tickets) – even if it is not enabled in the event and therefore cannot be changed by the guest during registration.
  • Click on "+Create new"

Image

Image -

With a dynamic master data field of the type "Image", you can request an image file from your guests.

Guests will see an upload option in the registration form where they can select and upload the relevant image file from their device.


This is how:

  • Click on "+Create new"
  • In the dialogue window, you can enter the following information:
    • Name
      Here you enter the name of the field that should be displayed in the form.
    • Description
      If you wish, you can enter a descriptive text for the field here, in which you can provide your guests with further information about what the field is used for.
    • Code for dynamic placeholders
      If desired, you can assign a code here so that you can incorporate the content of the field as a placeholder to personalise information in e. g. emails, name tags or the event website.
    • Type
      Image
    • Enabled
      This option should be enabled (=toggle on green) if you want to use the field.
    • Available globally
      If you activate this option, the field can always be used for conditions (event-specific fields and tickets) – even if it is not enabled in the event and therefore cannot be changed by the guest during registration.
  • Click on "+Create new"

File

File -

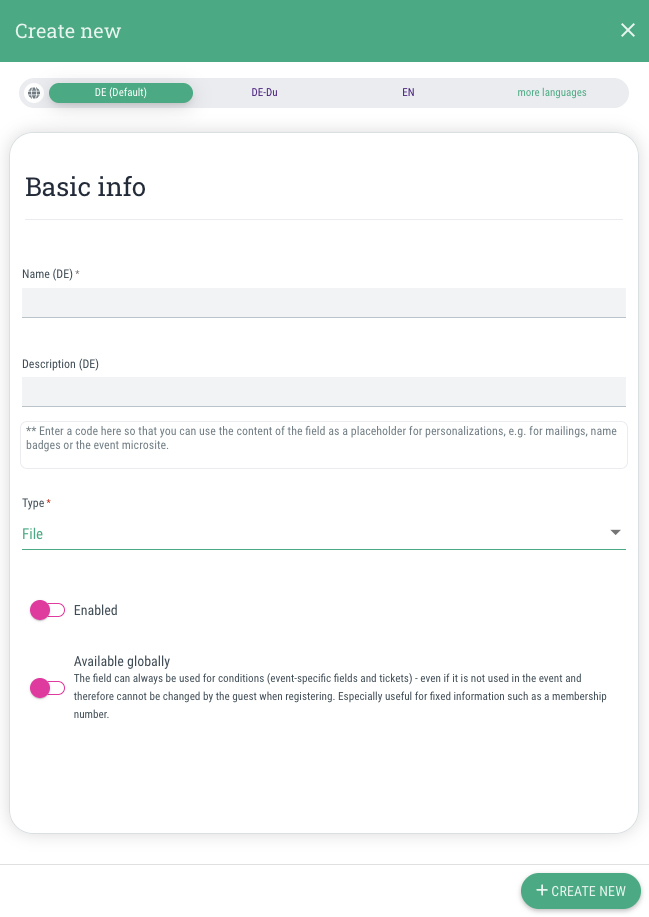
With a dynamic master data field of the type "File", you can request a file from your guests.

Guests will see an upload option in the registration form where they can select and upload the relevant file from their device.


This is how:

  • Click on "+Create new"
  • In the dialogue window, you can enter the following information:
    • Name
      Here you enter the name of the field that should be displayed in the form.
    • Description
      If you wish, you can enter a descriptive text for the field here, in which you can provide your guests with further information about what the field is used for.
    • Code for dynamic placeholders
      If desired, you can assign a code here so that you can incorporate the content of the field as a placeholder to personalise information in e. g. emails, name tags or the event website.
    • Type
      File
    • Enabled
      This option should be enabled (=toggle on green) if you want to use the field.
    • Available globally
      If you activate this option, the field can always be used for conditions (event-specific fields and tickets) – even if it is not enabled in the event and therefore cannot be changed by the guest during registration.
  • Click on "+Create new"

Checkbox

Checkbox -

With a dynamic master data field of the type "Checkbox", you can give your guests the option of ticking a box next to text that you have defined.

Guests see the relevant text in the registration form and can decide whether to tick the checkbox (equivalent to a "yes" or agreement with the text) or not (equivalent to a "no" if the text entered does not apply to them).


This is how:

  • Click on "+Create new"
  • In the dialogue window, you can enter the following information:
    • Name
      Here you enter the name of the field that should be displayed in the form.
    • Description
      If you wish, you can enter a descriptive text for the field here, in which you can provide your guests with further information about what the field is used for.
    • Code for dynamic placeholders
      If desired, you can assign a code here so that you can incorporate the content of the field as a placeholder to personalise information in e. g. emails, name tags or the event website.
    • Type
      Checkbox
    • Enabled
      This option should be enabled (=toggle on green) if you want to use the field.
    • Available globally
      If you activate this option, the field can always be used for conditions (event-specific fields and tickets) – even if it is not enabled in the event and therefore cannot be changed by the guest during registration.
  • Click on "+Create new"

Country

Country -

The "Country" field type is used to ask your guests for a country, e.g. their country of origin, the country they want to travel to, etc.

In the form, the field is displayed as a drop-down menu with an integrated search function, so that guests can either search for their country using the search function or select it directly from the drop-down list.


This is how:

  • Click on "+Create new"
  • In the dialogue window, you can enter the following information:
    • Name
      Here you enter the name of the field that should be displayed in the form.
    • Description
      If you wish, you can enter a descriptive text for the field here, in which you can provide your guests with further information about what the field is used for.
    • Code for dynamic placeholders
      If desired, you can assign a code here so that you can incorporate the content of the field as a placeholder to personalise information in e. g. emails, name tags or the event website.
    • Type
      Text (single-line)
    • Enabled
      This option should be enabled (=toggle on green) if you want to use the field.
    • Available globally
      If you activate this option, the field can always be used for conditions (event-specific fields and tickets) – even if it is not enabled in the event and therefore cannot be changed by the guest during registration.
  • Click on "+Create new"
Examples of use

With a field of the type "Country", you can ask your guests for the following information, for example:

  • Country of birth
  • Destination
  • etc.

Notification email (CC)

Notification email (CC) -

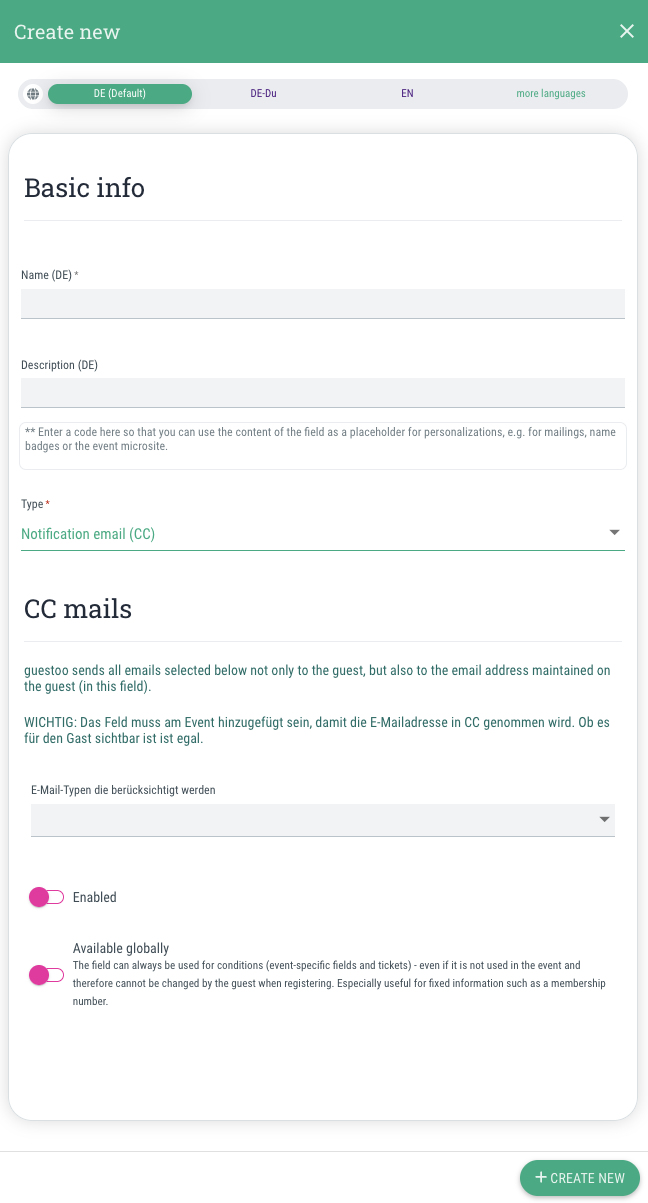
With a dynamic master data field of the type “Notification email (CC)”, you can request an email address from your guests to which a copy of the emails from guestoo will be sent.

As the organizer, you can specify for which types of emails this email address is set to CC, e.g., only for invitation emails, etc.


This is how:

  • Click on "+Create new"
  • In the dialogue window, you can enter the following information:
    • Name
      Here you enter the name of the field that should be displayed in the form.
    • Description
      Hier kannst Du auf Wunsch einen beschreibenden Text für das Feld eingeben, in dem Du Deinen Gästen z. B. weitere Informationen dazu geben kannst, wofür das Feld benötigt wird.
    • Code for dynamic placeholders
      If desired, you can assign a code here so that you can incorporate the content of the field as a placeholder to personalise information in e. g. emails, name tags or the event website.
    • Type
      Notification email
    • Email types to be considered
      Here you can select which types of emails should be sent as a copy to the registered email address (multiple selections possible).
      You can choose between:
      • Guest: Invited by organizer
      • Guest: Confirm registration
      • Guest: Payment information
      • Guest: Invoice
      • Guest: Invoice canceled
      • Guest: Check-in open
      • Guest: Check-out pending
      • Guest: Registration successful
      • Guest: Registration successful (for waiting list)
      • Guest: Registration successful - order approval pending
      • Guest: Registration confirmation
      • Guest: Registration confirmation after data change
      • Guest: Declined by organizer
      • Guest: Declined by guest
      • Guest: Changes to event
      • Guest: Event reminder
      • Guest: Info mail to event
      • Guest/Contact person: Notification about check-in
      • Guest: Check-out notification
    • Enabled
      This option should be enabled (=toggle on green) if you want to use the field.
    • Available globally
      If you activate this option, the field can always be used for conditions (event-specific fields and tickets) – even if it is not enabled in the event and therefore cannot be changed by the guest during registration.
  • Click on "+Create new"
  • Note: The email address stored for the guest will receive the email if the field has been added in the "Form" tab of the event. It does not matter whether the field is visible to the guest (green eye icon) or hidden (red eye icon).
Examples of use

This field type can be used for the following examples:

  • automatically notify their assistant, administrative staff, secretary, etc. of all important information about the event
  • enter their trainer's email address as a trainee so that the trainer is also informed about exam or training dates
  • etc.