Set up agency

Here you'll learn how to set up your agency step by step.

Du kannst für das guestoo Back-End zwischen zwei Darstellungsoptionen wählen. Die Screenshots in der Doku basieren auf dem "Klassischen Design".
Hier siehst Du die Unterschiede, damit Du dich auch im "Modernen Design" zurecht findest: » guestoo Back-End-Design

Before you create your first event, we'd advise to set up your agency first, because a lot of the data that is needed for the event will be drawn from the agency settings.

This is especially helpful if you intend to plan multiple events with guestoo, because you won't have to enter the same general data for every single event.


Let's go! :)


1. General information and organizer logo

Agency > Info > General information

1. General information and organizer logo - Agency > Info > General information

First, you should provide some general information about you as an organizer of events.

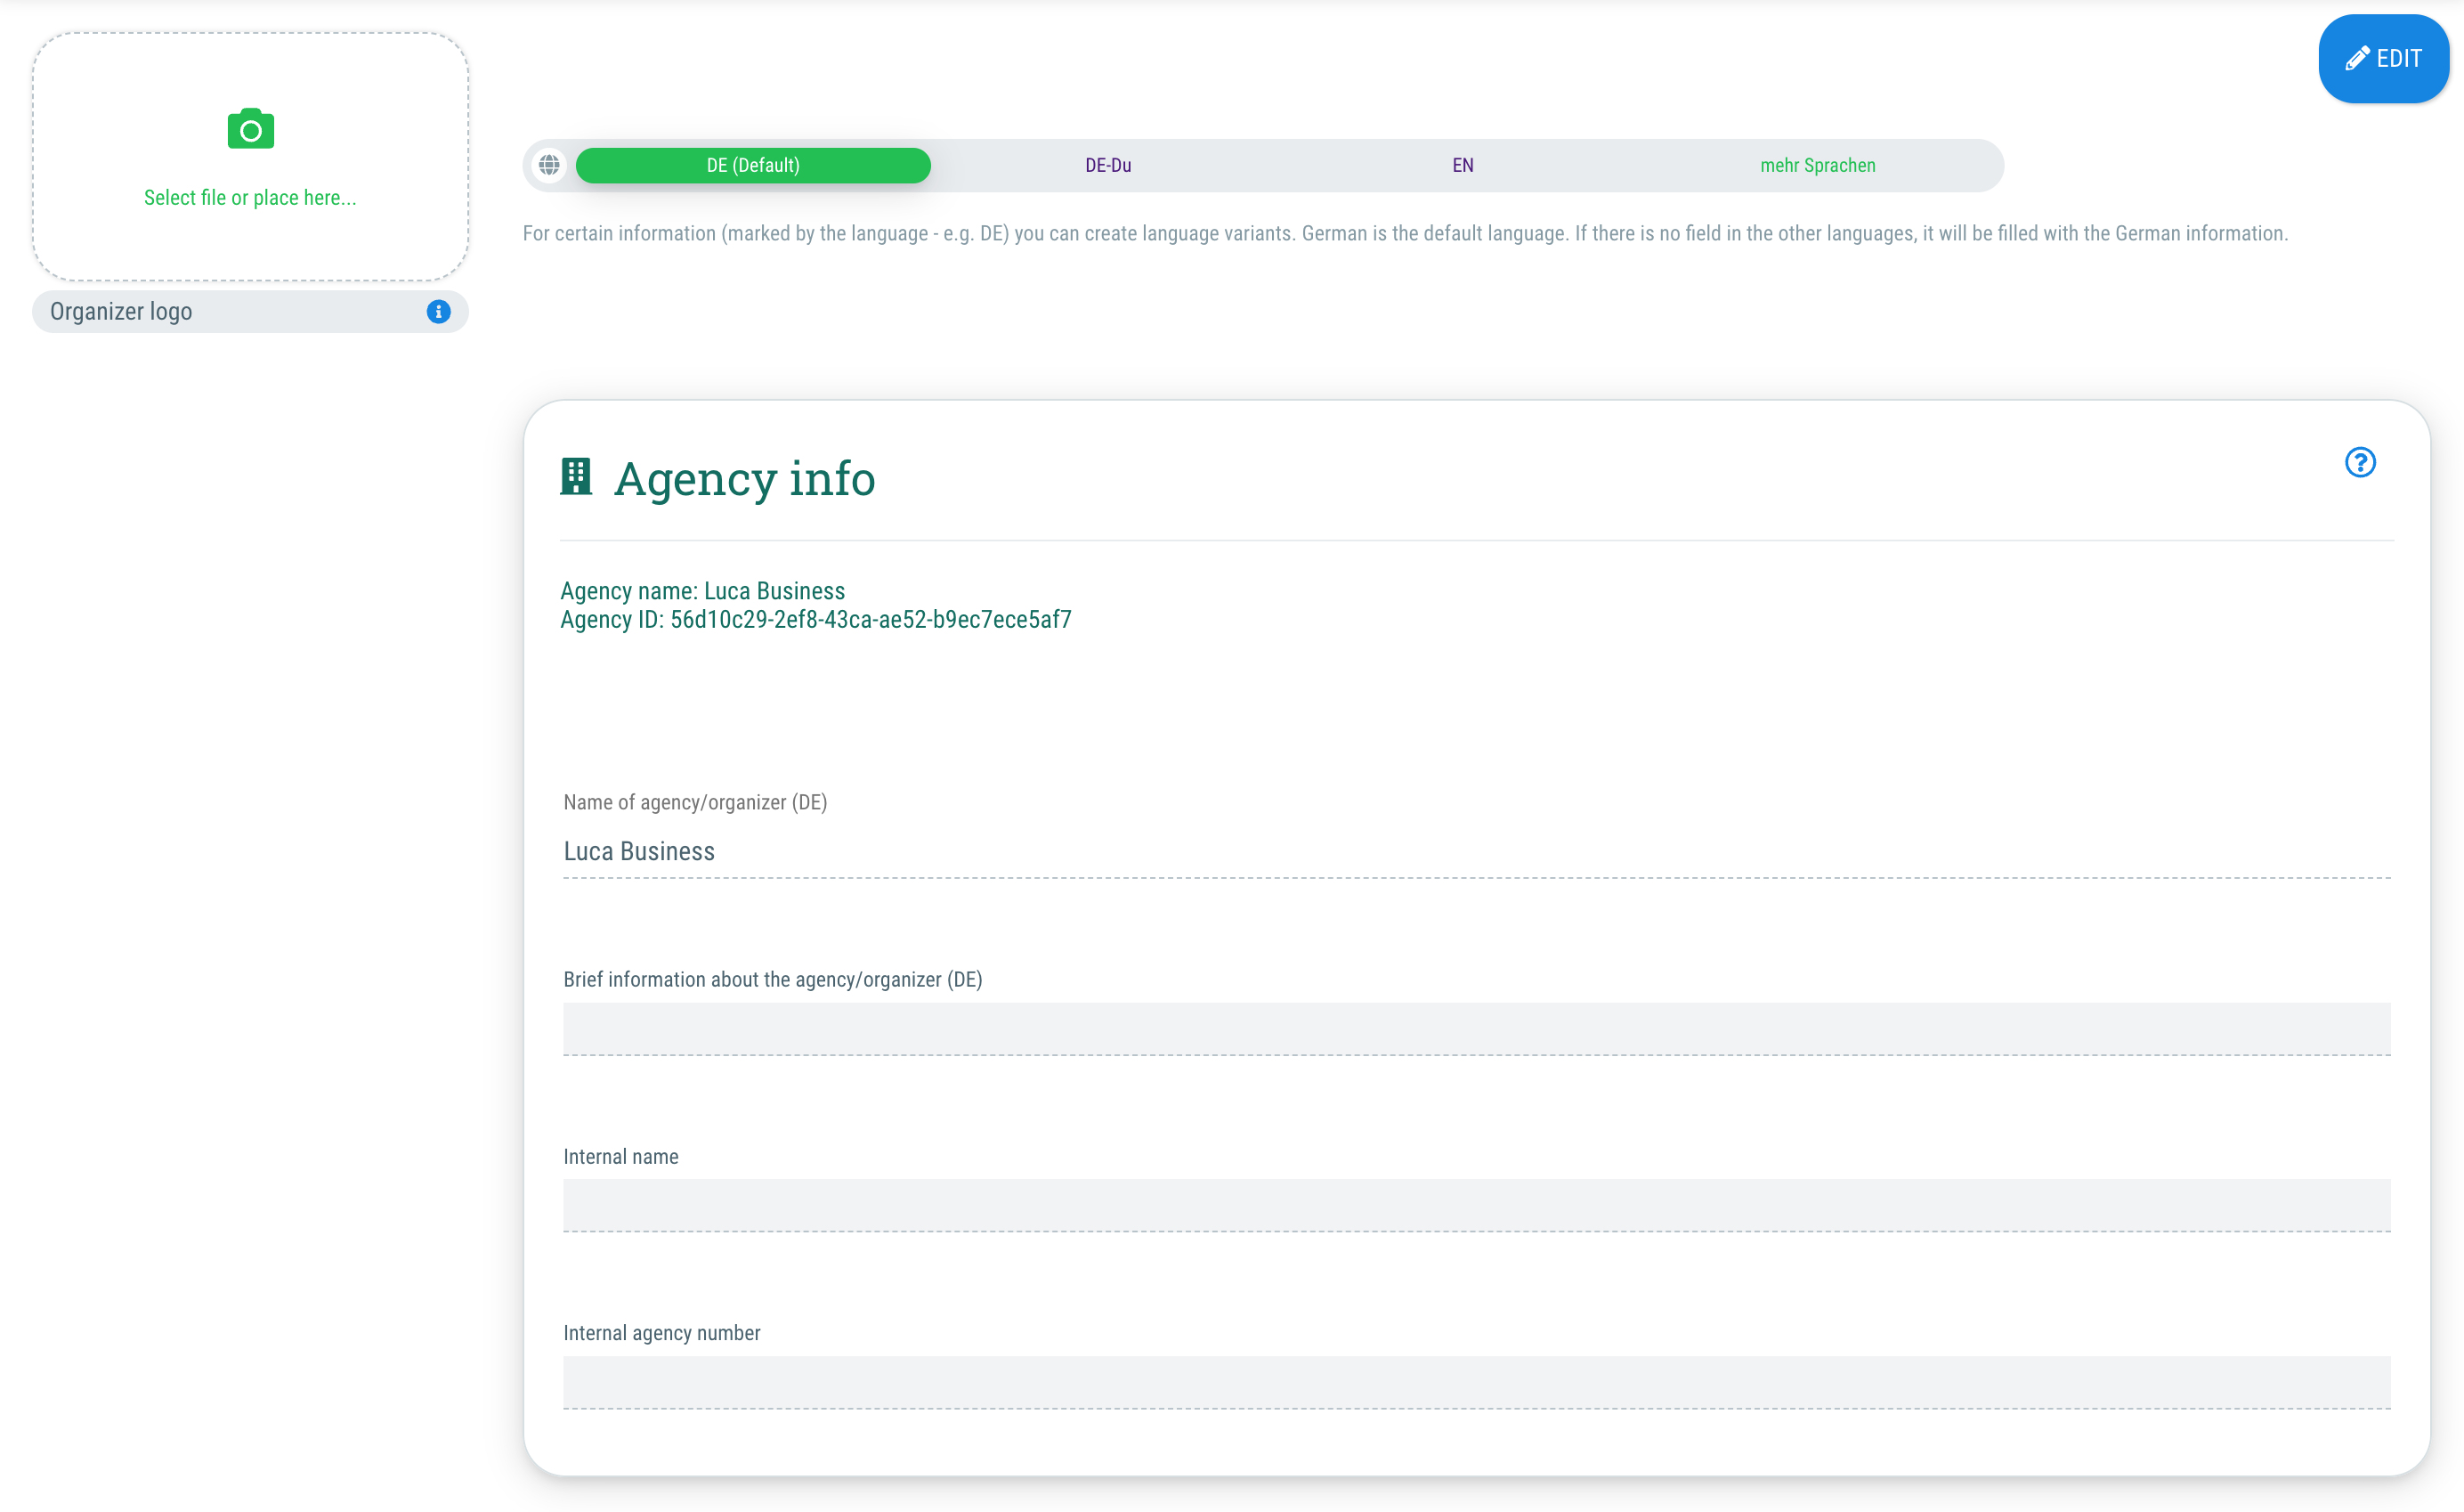
Select the menu item "Agency" and change to the "Info" tab.


Here you can enter the following data:

  • Name of agency/organizer
    This could be the name of your company or your own name, in case you only want to host private events.
  • Brief information about the agency/organizer
    Here you can give your guests a short introduction of you or your company as an organizer of events to give them some insight on the kind of events they can expect.
  • Internal name
    Here you can add an additional name for the agency that you use for your internal administration. This is especially useful if you use/manage different agencies on guestoo and want to be able to easily differentiate them in the menu. Your guests will not see this internal name - it is only visible to you and the manager users to make your internal administration easier. 
  • Internal agency number
    Here you can add an agency number that you use outside of guestoo, if needed. Your guests will not be able to see this agency number - it is only meant to make the internal administration easier for you.
  • Organizer logo
    Here you have the option to upload the logo of your company so that your guests can immediately see that the event belongs to your company. If you only use guestoo for private events, you could of course use a picture that suits you and the events you plan to organise with guestoo.

2. Contact person for guests

Agency > Info > Contact person for guests

2. Contact person for guests - Agency > Info > Contact person for guests

Secondly, you should provide the contact details of someone your guests can reach out to in case they have any questions or problems. That person could either be yourself or someone in your company or event planning team, who is responsible for looking after the guests at the event.

Please go to Agency > Info and enter the following information in the "Contact person for the guests" section:

  • Name
  • Phone number
  • Email
  • Additional contact info (e.g. "Can be reached daily between 10 and 11 a.m.") 

3. Legal texts

Agency > Info > Legal texts

3. Legal texts - Agency > Info > Legal texts

To avoid legal issues, it is important that you maintain the following legal texts:

  1. Imprint
  2. Privacy Policy
  3. Conditions

Important: Please note that guestoo does not offer legal advice and our information does not claim to be complete! If you have legal questions or need help with the creation of legal texts, please contact a lawyer, legal advisor or data protection officer.

4. Customise default email texts (optional)

4. Customise default email texts (optional) -

There are various email templates in guestoo that are required in the process of signing up for an event. We have already provided a default text for each template, which should be sufficient in most cases to ensure a smooth process. Of course, you can also customise the texts according to your individual requirements.


This is how:

  • Click on the menu item "Agency" and change to the "E-Mails" tab
  • Click on the "Edit" button in the top right corner
  • Change the default email texts to your liking
  • Click on the "Save" button in the top right corner
  • Done :)

Tip: To customise the texts, you can use the placeholders provided above the email text fields. Simply click on the required placeholder to copy it to your clipboard. Then paste the placeholder into the desired position in the mailing by right-clicking -> "Paste" or CTRL+V.


The following templates are available and can be adjusted individually:

  1. Invitation text:
    Your guests will receive this email when you manually add them to your event and send them an invitation via guestoo.
  2. DoubleOpt-In email (DOI): 
    The guest will receive this email after registering for the event to confirm their registration and the accuracy of their data.
  3. Confirmation email » Registered, but not yet confirmed:
    This text will be used in the confirmation email if you chose the event setting where you have to individually confirm every guest before they are allowed to participate in the event. 
  4. Email with Check-in link:
    This text is used for the header of the email that contains the check-in link.
  5. Email with Check-out link:
    This text is used for the header of the email that contains the check-out link.
  6. Cancellation to a guest:
    This email will be sent to a guest if you cancel their participation in the event.
  7. Confirmation email in case of cancellation by guest:
    This email will be sent as a confirmation if a guest cancels their participation in an event by clicking the "Cancel" button in the confirmation email.
  8. Confirmation email to the guest:
    This email will be sent to the guest once they confirmed their participation in the event and (if applicable) the correctness of their data by clicking the link in the DOI email.
  9. Default text agency user:
    This email is sent to people you invite to your agency as manager users. It contains a link that the person must click to create an account with which they can access your agency or specific events, depending on the assigned role.

5. Adjust design (optional)

5. Adjust design (optional) -

After entering the relevant information for your agency, it's time to set up the colors of your event pages, registration forms, tickets and emails according to your company's corporate identity.

This is how it works:

  • Click on the menu item "Agency" and change to the "Design" tab
  • Click on the "Edit" button in the top right corner
  • Enter the color codes (e.g. #000000) into the different fields or choose the desired colors with the color picking tool
  • Click on the "Save" button in the top right corner
  • Done :)


Important: The colors that you choose here can be individually adjusted in the event settings later, if you want to use individual colors for each event. The agency settings are used as a fallback, in case you don't specify any colors in the event itself.

Depending on your subscription, you'll see even more setting options in the "Design" tab. We won't go into depth on these settings in this tutorial to keep it short and easy. Feel free to try out those other setting options as well though, if they seem useful for your event. You'll find more information on these settings in our documentation.

6. Invite manager users

6. Invite manager users -

If you want to plan events together with other members of your team or assign other people to do the check-in for your events, you can invite those people to your agency as manager-users.

This is how it works:

  • Click on the menu item "Agency" and change to the "Users" tab
  • Click on the "+Add manager user" button
  • In the new window you can enter one or multiple email-addresses - either one in each row or separated by commas (,)
  • Once you entered the email-adress(es), you choose the role that you want to assign to the people you're about to invite to your agency:
    • Event-related managers: Can only see events which they have been assigned to in the "Settings" tab of the event. According to the role they've been assigned at the event, they can only check-in guests (Check-in manager) or edit the guest list (Event-related guest manager).
    • Event- and Guest-admins: Can create, manage and delete events and guests
    • Agency manager: Has full access to the agency's data. They are not allowed to administrate agency- or guest-managers, add new manager users or change the agency's subscription settings.
    • Administrator: Has full access to all of the agency's data and can change everything, including the guestoo subscription settings. Administrators can also add new manager users.
  • If you want to, you can change the info text that will be sent in the invitation email
  • Click on "Invite"
  • The invited people will now receive an email with the info text that you've entered. By clicking the link in the email, they will be redirected to a guestoo page where they can set a password for their manager account.
  • After inviting manager users to your agency, you can find them in the manager list under Agency > Users to change their settings and authorizations.
  • You can find further information on how to assign an event-related manager to an event on this page (German only).
  • Done!

7. Enter payment information


If you only plan to organise unpaid events, you can skip this step.


If you want to host paid events, it's important that you enter the necessary payment information for your guests. 

In order to do that, click on the menu item "Agency" and change to the "Payment info" tab. Here you can activate the different payment options and enter the needed information for your guests:


Prepayment (Bank transfer)

  • Click on the "Edit" button in the top right corner 
  • Activate the option "Activate: Prepayment (Bank transfer)" 
  • Enter the bank transfer details below
  • Enter a confirmation text and the text that should be displayed on the invoice
  • Click on the "Save" button in the top right corner

Invoice

  • Click on the "Edit" button in the top right corner 
  • Activate the option "Activate: Invoice"
  • Optional: You can activate the option to send out the confirmation email including the ticket(s) to your guests immediately after they sign up for the event - regardless of the payment status
  • Enter a confirmation text and the text that should be displayed on the invoice (incl. bank transfer details) 
  • Click on the "Save" button in the top right corner 

 Paypal

  • You can find further information on how to set up PayPal as a payment method for your guests on this site (German only)

Stripe

  • You can find further information on how to set up Stripe as a payment method for your guests on this site (German only)

Create invoices

  • guestoo can automatically send out invoices for the ticket purchases to your guests. You can find more information on this site (German only).

Legal texts

  • In order to add your legal texts, click on the "Edit" button in the top right corner
  • Enter the following legal texts:
    • Terms and Conditions
    • Cancellation Policy
    • Certificate conditions
  • Click on the "Save" button in the top right corner 
  • Note: If you need assistance with writing the legal texts, it is best to ask a lawyer and/or tax advisor. We at guestoo do not offer legal advice, therefore there are no corresponding templates available here.