If you want to create several new events with the same or similar timeslots and default settings, you can use the automated event creation system to do so.
All you need is an event template, in which you have already prepared all the settings that you wish to transfer to the events that you're going to create in the next few steps.
Once you have customized your template according to your wishes, proceed as follows:
- Go to "Events" and click on the desired template
- Click on the tab "Auto create"
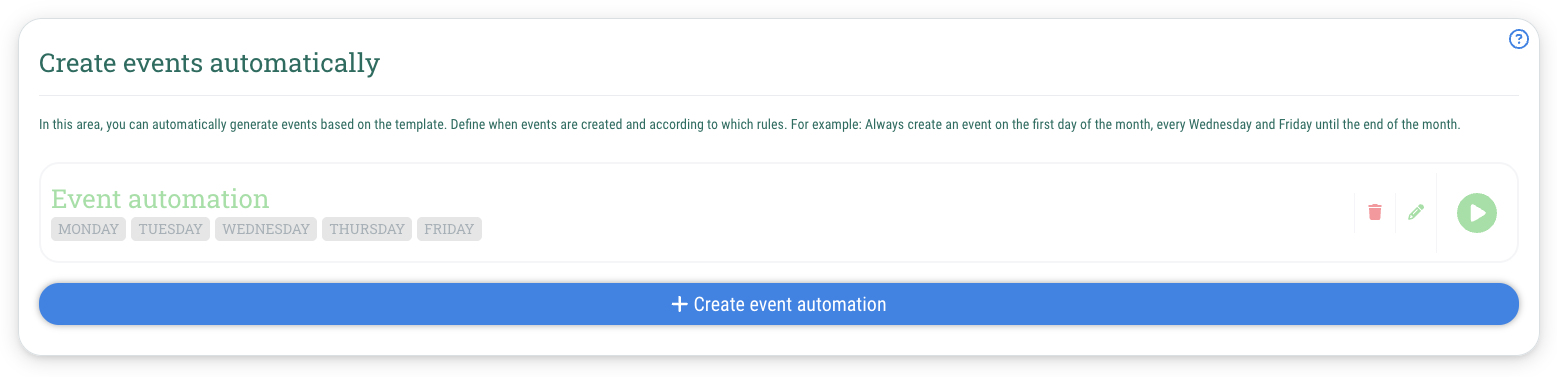
- Click on "+Create event automation" or on the pencil icon to the right of an already created scheduler
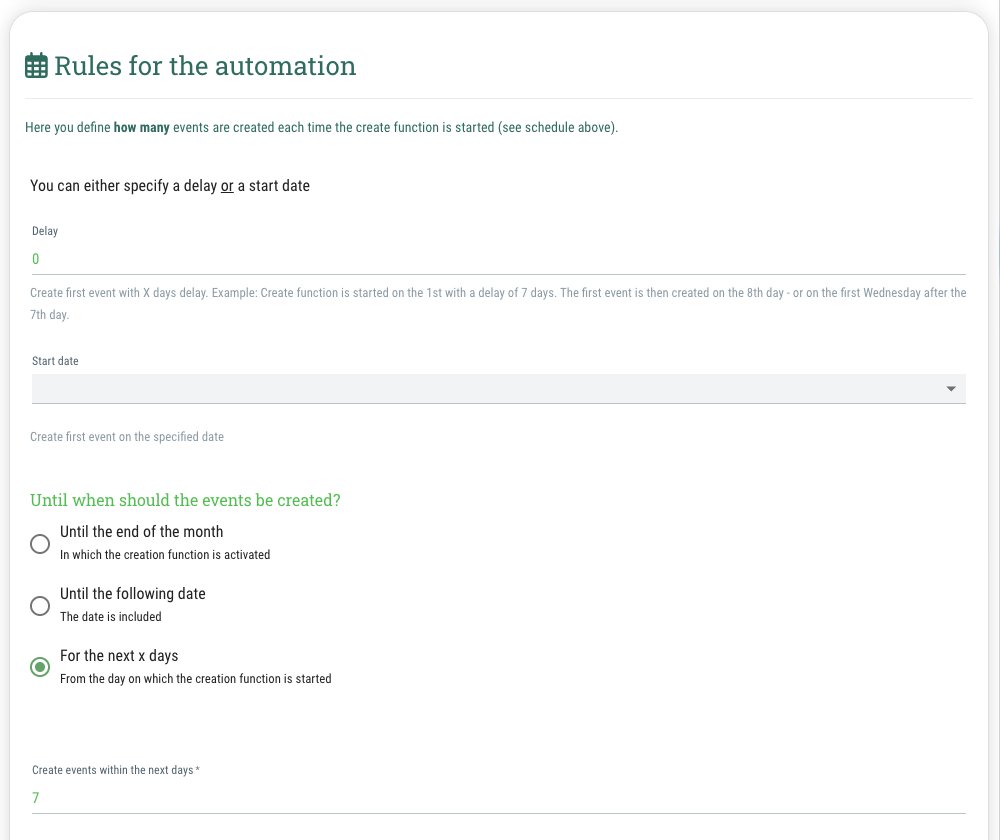
- Scroll down to "Rules for the automation"
- Delay: Here you enter the delay in days, the current day is counted in each case. This means, for example, if you want to create appointments from January 7th and the current date is January 2nd, the delay would be 5 days. It is also not a problem if you are not quite sure here, because before the appointments are finally created, you are shown a preview of the events that will be created
- Until when should the events be created? Here you can select whether the events should be created until the end of the month, until a date you specify or for the next x days
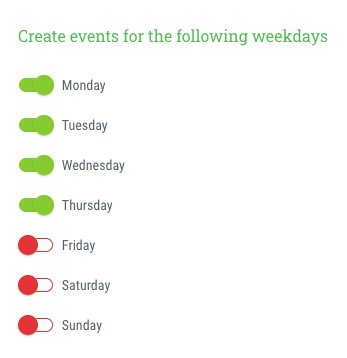
- Create events for the following weekdays: Here you select the days of the week for which the events should be created
- Note: If you have different opening hours on some days of the week, you can either work with different templates (e.g. one template for Monday to Thursday and another template for Friday and Saturday) or change the timeslots manually afterwards in each individual event if the changes are only minor
- Go to the tab "Modified content" and check whether the name of the event is correct. This is the name that is also displayed in the booking calendar
- As soon as everything is set, click on the "Save button"
- In order to create the new events, click on the play symbol (triangle) next to the event automation you just created
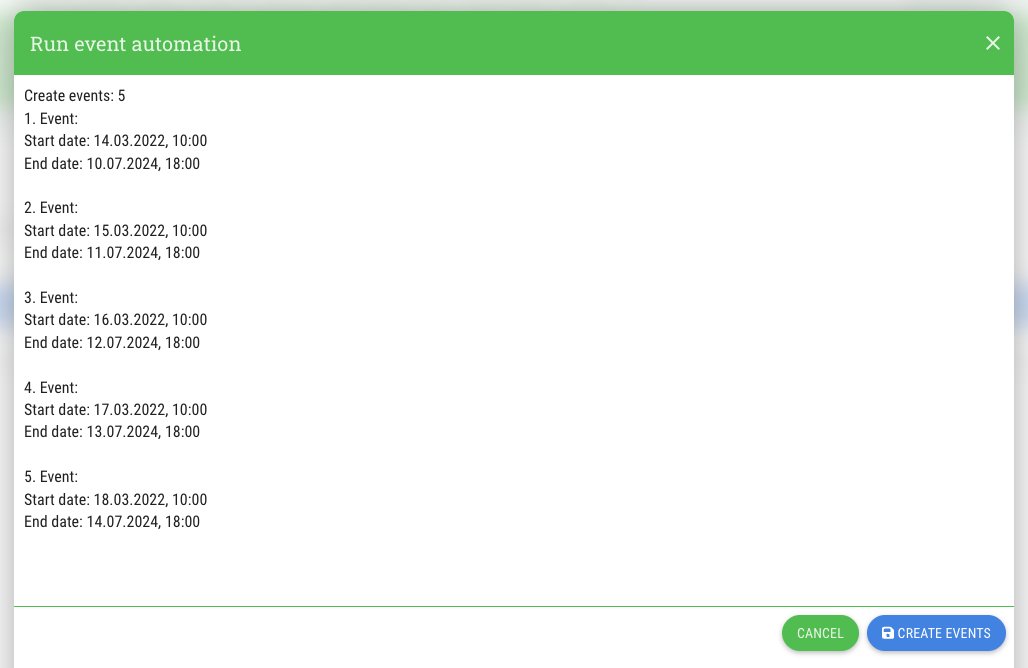
- You will now be shown a preview of the events that will be created
- Double check these and, if everything is correct, click on the “Create events” button. If you create a lot of events at once, this may take a moment
- Done! The events have now been created and can be changed manually if necessary, e.g. if there are shorter opening hours on one some days (public holidays etc.)