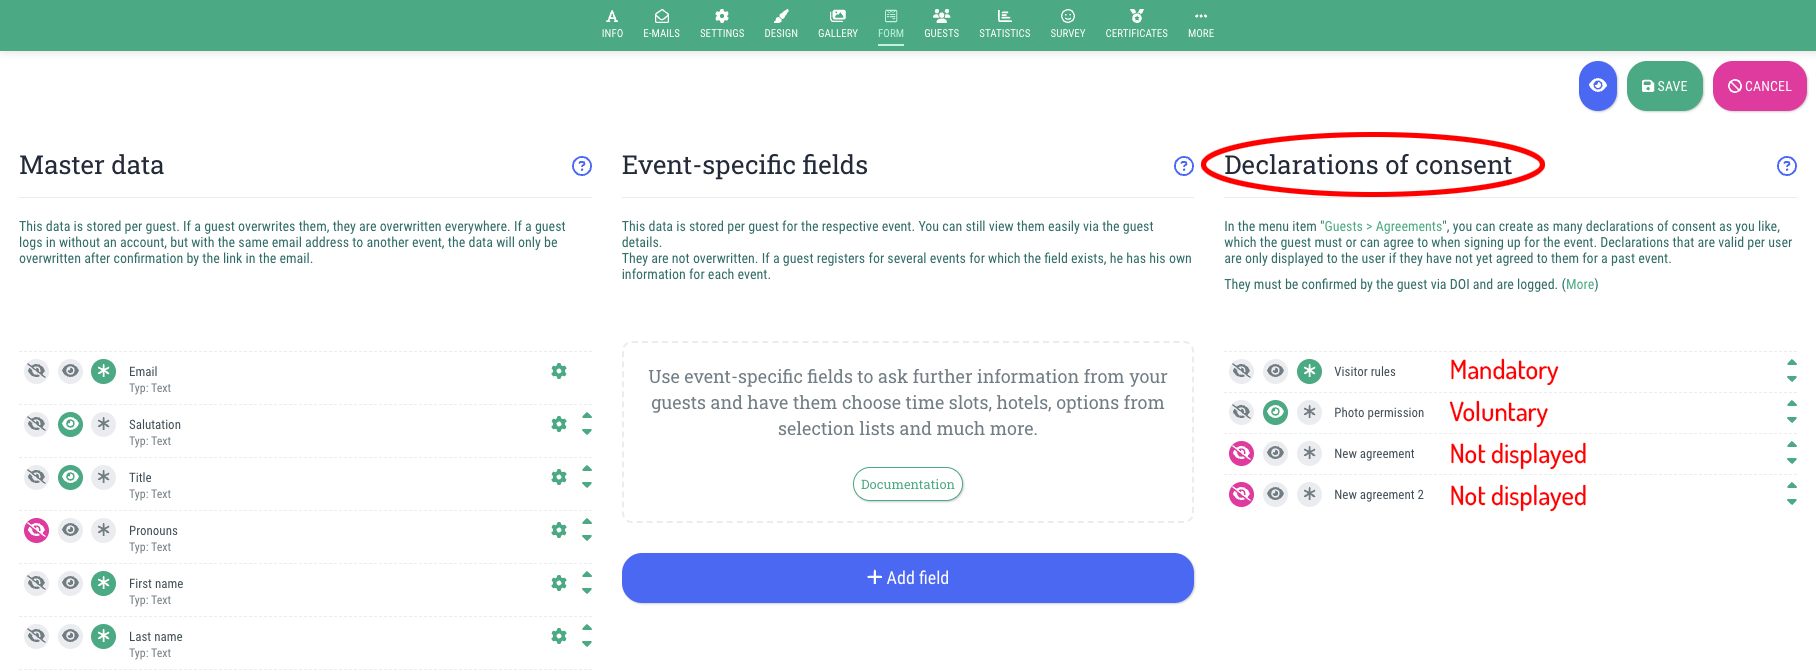


You can create, edit or delete any number of agreements under the “Agreements” menu item.
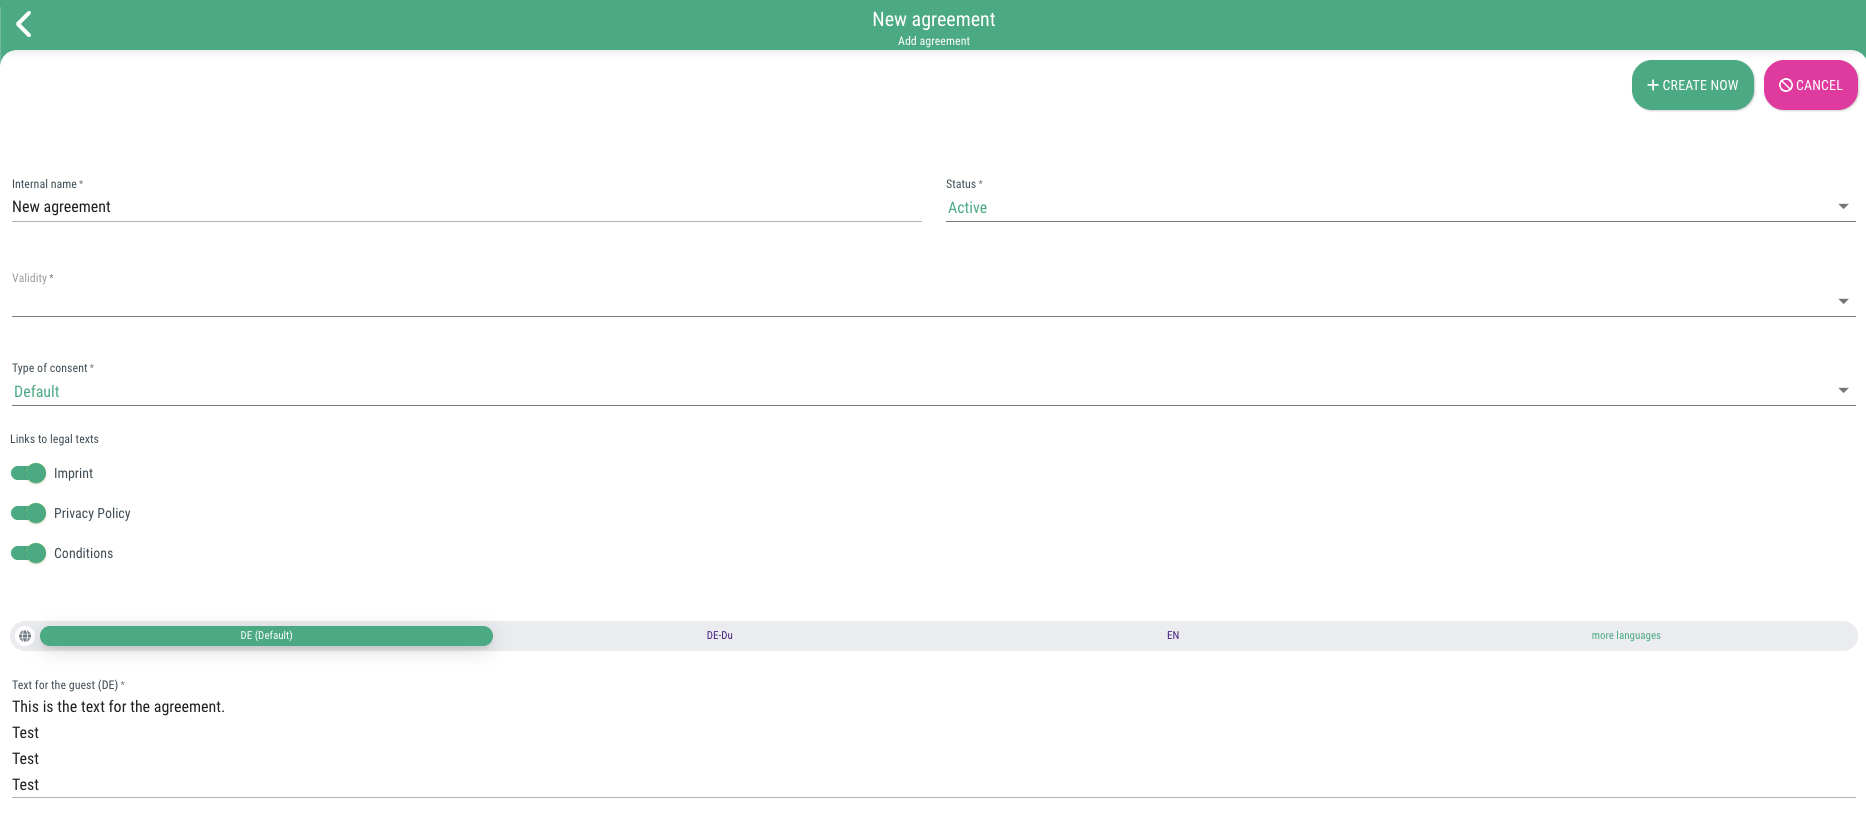
This is how you create an agreement:
- Go to the menu item "Agreements"
- Click on the "+ Add agreement" button
- Fill in the following fields:
- Internal name
Name for the declaration of consent for internal administration (not visible to the guest) - Status
Can be used to globally hide the declaration of consent (= Inactive) - Validity
Here you specify whether the guest must agree once (globally) or per event (event-related).
Note: If you create a global agreement, the guest only has to agree to this when registering for one of your agency's events. If they subsequently register for another event, the agreement will not be displayed again. - Type of consent
- Default
If you select this option, you can (de)activate the agreement at the event of your choice. - Signature during the check-in process
If you select this option, the guest will be asked for the agreement at check-in and can (or must, depending on the settings at the event) agree to this agreement by signing it at check-in.
- Default
- Links to legal texts
Here you can select which of the legal texts (legal notice, data protection information, terms and conditions) that you have entered at the event should be linked after the agreement text. You can select one or more (or none) of the legal texts by activating the switch next to the text (= Toggle on green) - Text for the guest
Here you enter the text to be displayed to the guest. The text will be sent and logged in the confirmation email.
- Internal name
- Click on "+Create now"
- Done