Dyn. personalization

Here you can find out how to create dynamic personalizations that allow you to display different text blocks to your guests based on conditions you specify.

Needed feature: Dynamic text blocks

Du kannst für das guestoo Back-End zwischen zwei Darstellungsoptionen wählen. Die Screenshots in der Doku basieren auf dem "Klassischen Design".
Hier siehst Du die Unterschiede, damit Du dich auch im "Modernen Design" zurecht findest: » guestoo Back-End-Design

You can use dynamic personalization for the following use cases, for example:

  • Salutations: Dear Paul / Dear Josefine / Dear Lou
  • Different addresses within texts: We would like to invite you / We would like to formally invite you
  • Additional content for VIP guests
  • Additional information that is only displayed to guests who have made a specific selection in the form (e.g. if a shuttle service is necessary)
  • etc.

Create dynamic personalization

Create dynamic personalization -

This is how you create a new dynamic personalization:

  • Go to the menu item "Settings"
  • Change to the tab "Dyn. personalization"
  • Click on the button "+Create new"
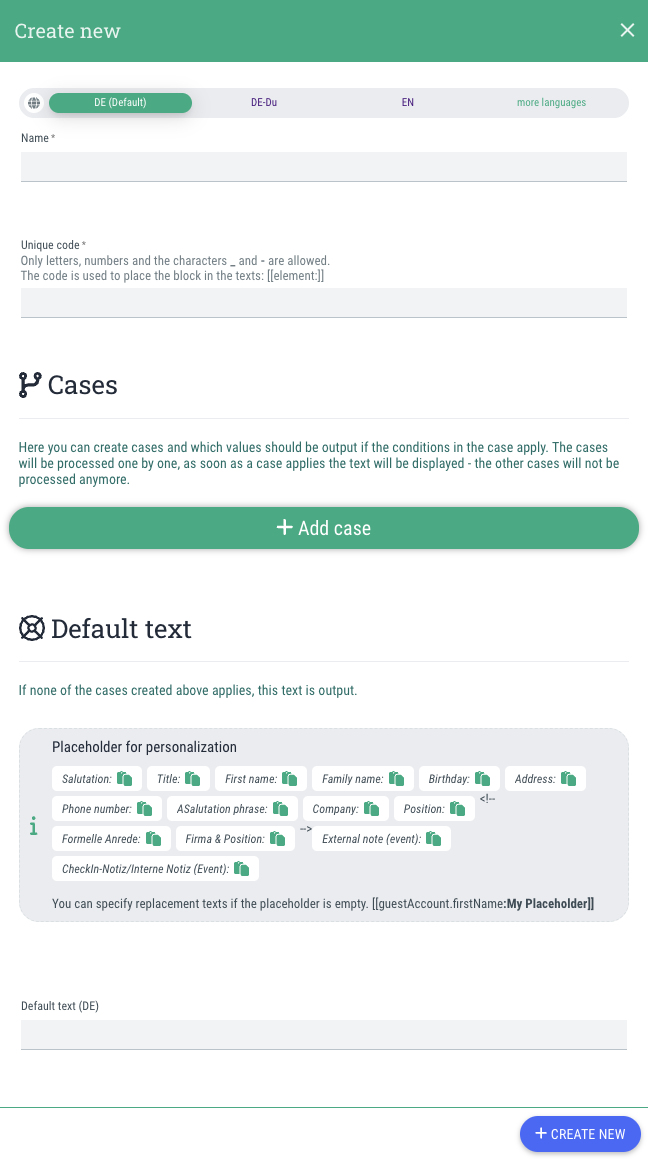
  • Name:
    Here you define the name of the personalization. This is only for your internal administration and is not displayed to guests.
  • Unique code:
    Hier legst Du den Code fest, den Du zum Einbinden der Personalisierung in Texten nutzen möchtest. E.g if you enter "personalisationcode23" here, you need to use the code in your text.
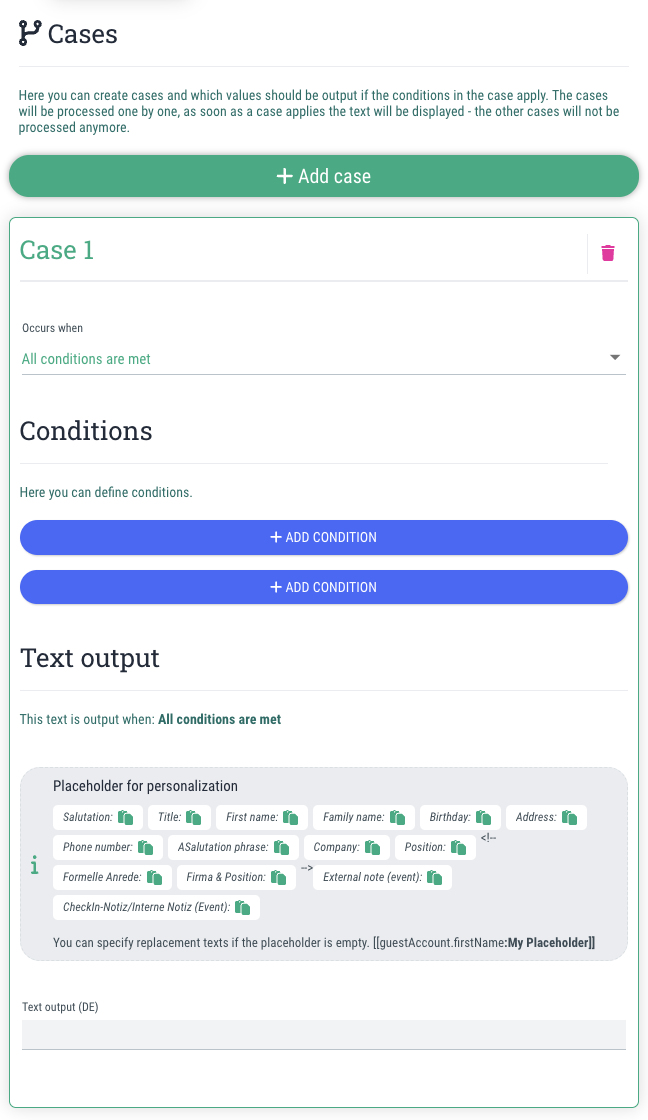
    Note: Only letters, numbers and the characters _ and - are permitted.
  • Create any number of cases by clicking on "+Add case" and define the corresponding conditions for each case (see below)
  • Default text:
    Here you define the text that should be displayed if none of the cases you have created apply to a guest. This text is used as a fallback.
    You can also use placeholders in the text field if you wish.
  • Click on "+Create new"

Create new case

Create new case -

You should define at least one case for each dynamic personalization.


This is how:

  • Click on the "+Add case" button in the dialog window
  • Occurs when
    Choose between the following options:
    • All conditions are met
    • At least one condition is met
  • Click on "+Add condition" in order to define a condition
    • Field
      Select the field to which the condition should refer
    • Operator
      Choose the desired operator
    • Value
      Here you define the value that this field should (not) have
  • By doing this, you can define any number of conditions, one or all of which must be fulfilled in order for a guest to see the text
  • Text output:
    Here you define the text that should be displayed to the guest if one or all of the conditions defined above are met. You can also use placeholders in the text field if you wish.